Hooray for Luray Caverns

Reflecting Pond at Luray Caverns | TeamTravelsBlog

They say Virginia is for lovers, so we spent our New Years’ Eve weekend exploring its offerings. Luray Caverns and Monticello were highlights for day one. Read our next post about day two in Richmond, which impressed us more than we expected!

Virginia Weekend Highlights over New Years’ Eve Weekend 2017

  • Luray Caverns (near Shenandoah National Park)
  • Staunton (5 Historic Districts, Reunion Bakery & Espresso)
  • Charlottesville (Monticello, The Pie Chest, Pedestrian Mall)
  • Richmond (GardenFest Illumination at the Lewis Ginter Botanical Garden)

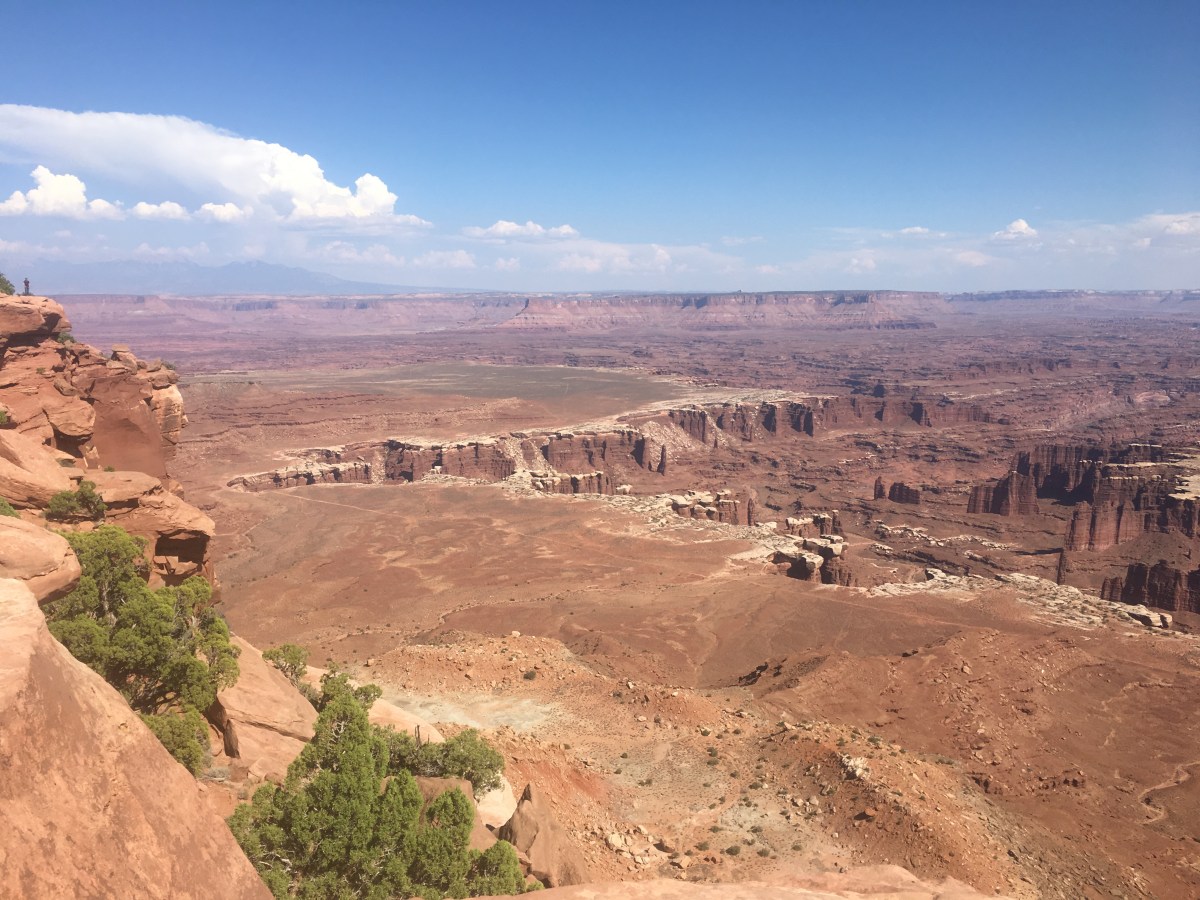
We left our place early on Saturday (December 30, 2017) in the morning to drive out toward Shenandoah National Park. We had our National Park pass ready, so we thought after seeing Luray Caverns, it would be nice to enjoy the drive south along Skyline Drive.

Fried Eggs at Luray Caverns | TeamTravelsBlog

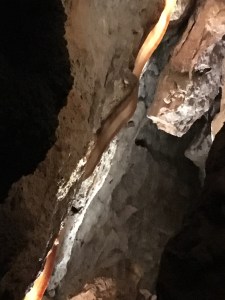
Unfortunately, due to snow, we learned that many parts of Shenandoah were closed. We went ahead and drove directly to Luray Caverns and bought our ticket for the next tour. At this point in time, we had been to a few other caves (Cave of the Winds in Colorado, Wind Cave in South Dakota and Jewel Cave National Monument in South Dakota) and had enjoyed each experience as every cave seems to have something unique about them.

Reflecting Pond at Luray Caverns | TeamTravelsBlog
Reflecting Pond | TeamTravelsBlog

Make sure to read the rules online about your boots before heading out to a cave (hint: it has to do with bats and the spread of white-nose syndrome). Luray Cavern has many “must sees” including the reflecting pond, the stalacpipe organ and fried eggs. My biggest piece of advice is to make sure you know how to use your phone camera or regular camera in lower light settings.

Stalacpipe Organ | TeamTravelsBlog

Your ticket also gets you admission into a few of the nearby buildings, so if you’re into old cars it’s worth taking a walk through the Car and Carriage Caravan Museum or if you’re into old toys you may want to pop through Toy Town Junction which are both in the same parking lot.

We headed south from Luray to a small historic town called Staunton. Staunton is made up of five historic districts (Newtown; Wharf Area; Beverley; Gospel Hill; Stuart Addition). Staunton is home to Mary Baldwin University, the Woodrow Wilson Presidential Library and the American Shakespeare Center. We parked near both between the Beverly District and Gospel Hill and enjoyed a walk downtown along S New St. This street has a historic store front called Cranberry’s Grocery and Eatery and a nice coffee shop called Reunion Bakery & Espresso. | TeamTravelsBlogIt’s also a short walk to the train tracks and the Wharf District, which has a cool bridge and the nearby Trinity Episcopal Church is worth a peek. Staunton also hosts a Harry Potter-esque world of wizardry weekend every September.

View from Wharf District Bridge | TeamTravelsBlog

For 2018, it’s called “Queen City Mischief and Magic”. While we haven’t been, I have read the city is transformed for this particular weekend. Plus, you’d be close enough to Shenandoah to potentially see the leaves change color! If you love Instagram like me (I hope you’ll follow me @TeamTravelsBlog), tag your Staunton pics with #LOVEStaunton #QueenCity and @visitstaunton .

From here, we continued eastward about 40 minutes to Charlottesville and specifically to Monticello, the home of Thomas Jefferson. We made it in time for the last regular tour of the day. This home should not be missed. We took the free shuttle to the house, then walked by the grave site and took a trail back to where the museums, gift shop and ticket counter were located. The tour guides are passionate about his life and sharing information about the house. The views also happen to be incredible!

From here, we went to downtown Charlottesville, where the University of Virginia is located. There’s a “pedestrian mall” which is essentially a car free street with a variety of stores, restaurants and bars. Similar concept to the 16th Street Mall you’d find in Denver, Colorado, just on a smaller scale. On one of the side streets, I saw a pie place called “The Pie Chest”.

Peppermint Crunch at The Pie Chest | TeamTravelsBlog

O.m.g. this place is amazing!! I could literally make a trip here just for the pie.

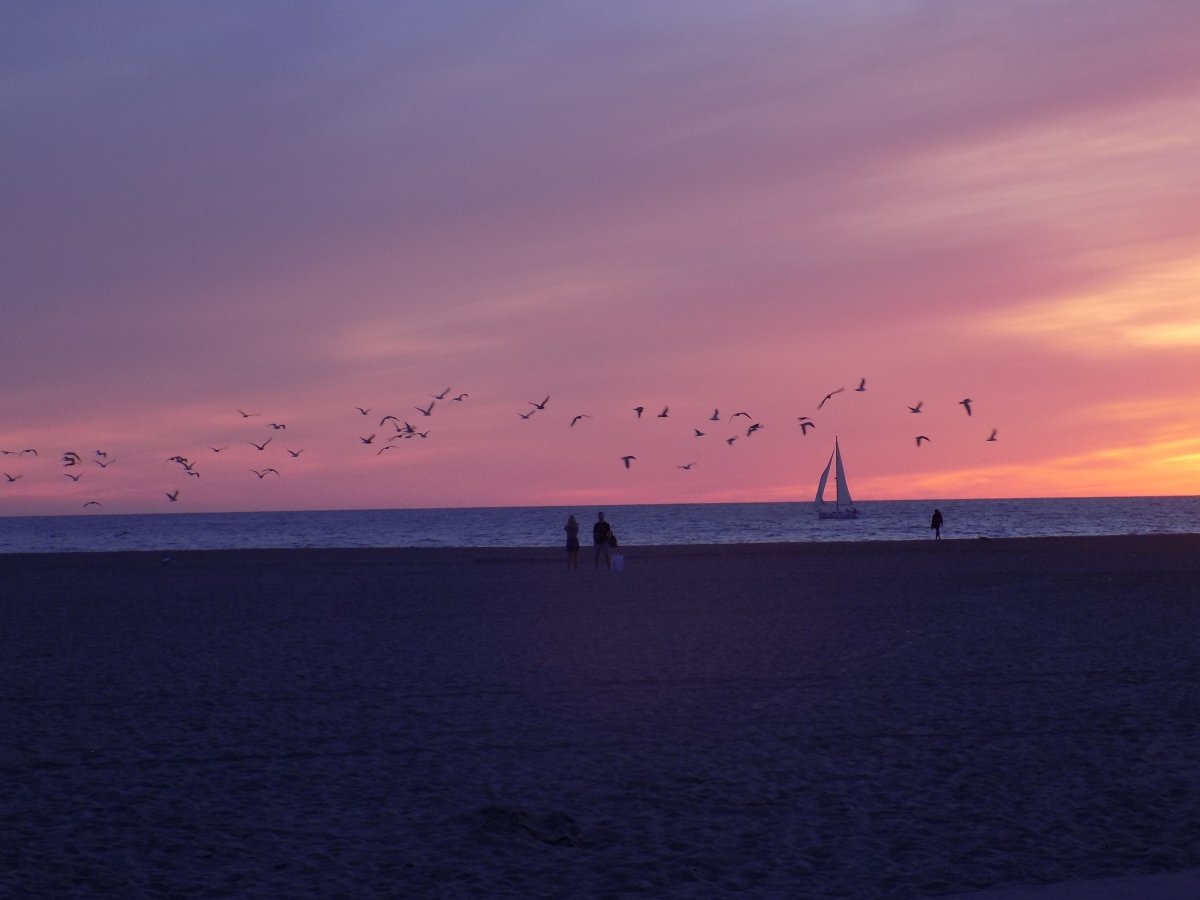
As if we hadn’t fit enough into our day, we drove about another hour to the Lewis Ginter Botanical Garden outside of Richmond. We wanted to see the beautiful winter lights display here called GardenFest Illumination. For many years we’ve gone to the National Zoo in Washington, D.C. to take in the free display of holiday lights, which are definitely a must see. But as we were looking for something different to do, this was great! There were a variety of indoor and outdoor displays, animals, storybook characters in lights (see the Giving Tree below), moving lights and changing colors.

Yep, we were exhausted by this point. I found a cheap, last minute deal using Booking.com (use my code and we each get $20) for a place under $60. We crashed and knew we’d have a chance to sleep in and then explore Richmond in the morning. If we took a similar trip, any must-see places you would recommend? Read all about our day in Richmond here!

Other nearby ideas if you’re planning a similar trip:

  • Shenandoah National Park
  • Staunton (Woodrow Wilson Presidential Library & Museum, American Shakespeare Center)
  • Charlottesville (Ash-Highland Estate)
  • Orange (Montpellier)

“Santa Barbara and the PCH Pacifically”

Sunset at Malibu State Park | Teamtravelsblog

Santa Barbara and the Pacific Coast Highway, California Highlights over Veterans’ Weekend 2017

  • Pacific Coast Highway – Malibu State Park, One Thousand Steps Beach, Carpinteria Bluffs, El Matador State Beach and the Malibu Pier
  • Stearns Wharf and State Street
  • Gaviota State Park via El Camino Real
  • Solvang for dessert and Sides for lunch
  • Lizard’s Mouth in the Los Padres National Forest
  • Sunset from Franceschi Park
  • Sunset by the Four Seasons Hotel

I can’t complain about the LA traffic, coming from the DC area. We left LA and headed west on the Pacific Coast Highway (PCH) toward Santa Barbara. Since the sunset was shortly before 5 p.m., we found a free spot along the PCH near a veterinarian hospital and walked into the Malibu State Park. The reflections and cranes in the water were beautiful. We walked to the beach and found a tiny obstruction blocking a clear picture of the sunset as the tide was rolling in. This didn’t stop us from enjoying it or getting pictures.

Sunset at Malibu State Park | Teamtravelsblog

We turned our attention to the water behind us and found fish jumping out of water and all kinds of birds! It was fun to watch along with the surfers on the ocean side. After the sunset, we continued our drive, to State Street in Santa Barbara. This is the happening street with the restaurants, shops, bars, etc. and we found free parking on Chapala Street. We walked to Stearns Wharf and saw (and heard) the party ships on the ocean. The boardwalk is nice to walk along and the seafood restaurant toward the end has live lobsters and crabs you can catch a glimpse of in the window. Reminded me of trips to Publix as a kid when my brother and I would watch the live lobsters when we were grocery shopping with our Dad. Before heading to our friends’ place, I got an evening coffee at the Santa Barbara Coffee Roasters which was the only open coffee shop I could find on Saturday night.

We met our friends at a gorgeous mansion about 15 minutes from downtown Santa Barbara. They rent a room and bathroom is a beautiful home with eclectic art work, an expansive backyard and multiple fireplaces! We got to stay in the amazing loft! The place felt like a dream!

Gaviota State Park | Teamtravelsblog
Gaviota State Park with our friends | Teamtravelsblog

After a restful evening, we ate a delicious breakfast and then drove to Gaviota State Park via El Camino Real. We parked up the hill from the park, in a free spot and took a nice short hike. We then walked into the park for a view from the beach. From here we drove about 20 minutes to Solvang. This city is amazing!

Solvang, Danish Town | Teamtravelsblog

It was founded over 100 years ago by 3 Danish men. There are tons of bakeries, cute shops and details to see like old red phone booths (we couldn’t help ourselves) and windmills. After exploring the town, we were starving! We at a place relatively close by called Sides. The food here was literally, the best we’ve ever had! The burger, fish tacos and butternut squash soup were incredulous!

We knew we wanted to walk off our food, so we drove through Los Padres National Forest and headed for Lizard’s Mouth Rock. Prepare yourself for the windy drive to get here! This was a short, but amazing walk! The large rocks overlooking Santa Barbara and the Pacific Ocean are a must see! We took endless selfies! We made our way from here to the One Thousand Steps beach before high tide. Luckily, it wasn’t literally 1,000 steps to the beach. The beach is covered in beautiful rocks.

One Thousand Steps Beach | Teamtravelsblog

As it was getting closer to sunset, we made our way to State Street. We got coffee at Dune and explored Paaseo Nuevo, saw the McConnell’s ice cream store and then drove to Franceschi Park. It was crazy to learn that the surrounding houses had banded together to get approval for an illegal gate to block visitors from visiting this park months prior. We didn’t have any issues, parked in one of the limited spots and took in a gorgeous purple sunset! We also explored the abandoned looking mansion.

Franceschi Park Sunset | Teamtravelsblog

As if we hadn’t packed enough into one day, we drove to the Four Seasons Hotel in Montecito to see the last bit of the sunset. Back at the SB mansion, our friends introduced us to a game called Exploding Kittens*! It was such a blast.

Monday morning we woke up at the crack of dawn and drove to Carpinteria Bluffs. We love seeing animals in their natural habitat and after a leisurely walk, we found the sunbathing seals! We’re glad we didn’t give up – it really was only a matter of continuing to walk north with the ocean to your left until you see them.

Seals at Carpinteria Bluffs | Teamtravelsblog
Montecito Sunset | Teamtravelsblog

The Pacific Coast Highway (PCH) is exactly what we hoped – a relaxing drive with non-stop beaches to pick from. We stopped at El Matador State Beach, Zuma Beach and Malibu Beach and Pier on our drive back to Los Angeles. El Matador was our favorite as we saw a perched pelican, tons of curlews (type of bird) and two beach photo shoots! The rock formations are really incredible here too.

If you want to read about how we spent the rest of our Monday in Los Angeles or our day prior to Santa Barbara, check out my previous article titled, “Ve-nice to Hollywood”. Los Angeles, Santa Barbara and the connecting Pacific Coast Highway are completing doable on a long weekend! I hope you picked up some tips!

Us at the Lizard's Mouth | Teamtravelsblog
Us at the Lizard’s Mouth | Teamtravelsblog

Ve-nice to Hollywood

Hollywood Sign | Teamtravelsblog

Lots to see in Los Angeles and it’s more than the rich and famous! Hiking to the Hollywood sign, seeing the Melrose Avenue street art and taking in the Venice Beach sunset are among the highlights!

Los Angeles, California Highlights over Veterans’ Weekend 2017

  • Santa Monica Pier
  • Venice Beach (sunset, street art and bread pudding)
  • Venice Canals
  • Third Street Promenade and Sidecar Donuts
  • Hike to the Hollywood sign and Bronson Caves
  • Graffiti at the Old LA Zoo
  • Walk of Fame on Hollywood Boulevard
  • Street art on Melrose Avenue and Alfred Coffee on Melrose Place
  • View from the Griffith Observatory

When we find a great flight deal we go for it! We took a direct Spirit flight from Baltimore (BWI) to Los Angeles (LAX) and arrived shortly after noon on Friday, November 10th. We picked up our cheap rental car from Payless since we got a great deal through CarRentals.com. While it wasn’t the fastest service and we caught them trying to charge us the wrong price, everything ultimately worked out and we were on our way without being upsold on any of the extras. We parked the car at the Convention Center by the Santa Monica Pier and met our friends. (Traveler tip: If you go on a weekday, park at the Santa Monica mall instead. The Convention Center is a good cheap spot on the weekend.) The pier was fun to walk along – enjoyed the street performers, checked out the roller coasters, got our picture with the “66-End of Trail” sign and saw the fishermen at the end of the boardwalk. We especially enjoyed watching the sunset here.

Santa Monica Pier | Teamtravelsblog

We moved our car to Ocean Boulevard street parking part way between the Santa Monica beach and Venice beach to a meter that was free after 6 p.m. We walked along the pedestrian and bike path, which was lit. When we got to Venice beach where all of the stores are, we found lots of homeless and seemingly homeless people. While we felt safe, it didn’t seem like our kind of scene (read to the end to see how our opinion changed on our second visit here). We continued from here to the Venice Canals. The houses along the canals are beautiful and if you’re lucky, people will have their lights on so you can get a peek inside their living rooms. I’d love to find an AirBNB here!

Venice Canals | Teamtravelsblog

I saw a picture of the Sidecar Donuts on Instagram and I knew I had to try one! We parked on 5th Avenue, paid the meter and made the short walk. I tried the maple bacon donut and it was SO GOOD! From here we walked down the Third Street Promenade. It reminded us of carless streets like the 16th Street Mall in Denver. We watched more street performers here, saw a Barnes & Noble with the old school signing and found huge hedge dinosaurs. We also poked our head down 4th Street which had trees decorated with colorful changing lights. Before calling it a night, we took a quick detour to Rodeo Drive and saw all of the fancy designer stores.

Instead of carsleeping this trip, we stayed at our friends’ place nearby, ate a lovely homemade breakfast, got serenaded by their 3 year old with Let It Go and headed out the door by 8 a.m. We arrived at 3200 Canyon Road by 8:30 a.m. and were able to secure a parallel parking spot for free. It’s a steep hike, but a rewarding hike from here to the Hollywood sign.

Hollywood Sign | Teamtravelsblog

While it was a bit foggy, we did enjoy seeing downtown LA from the top too. Before returning to our car, we made a left past the Smokey the Bear sign and made the very short trip up to the Bronson Caves. They’re cool to walk through and if you walk all the way around, you’ll get another view of the full Hollywood sign. We were back in the car by 11 a.m. and made a short trip to the Old L.A. Zoo in Griffith Park. The parking was plentiful and free. After a few minutes of seeing the old cages that were abandoned in the 1960s, I was ready to go and didn’t see the appeal. It didn’t look like the Instagram pictures I had seen that showed graffiti. The trick is you have to climb the stairs in the second exhibit or come down from the top. The graffiti work is really cool and it’s a bit eerie to crawl through what used to be animal enclosures.

Old LA Zoo Graffiti | Teamtravelsblog

From here we headed to see the Walk of Fame on Hollywood Blvd. Luckily we found two hour free parking on Emmet Terrace. Hollywood Boulevard is extremely touristy with some inappropriate stores, but for us, we had to at least see some of the famous stars. We enjoyed calling out names and noticing the different symbols depending on the person’s industry (e.g., entertainment, music, television, etc.).

Walk of Fame | Teamtravelsblog

After we got our fix and checked this off the list, we headed to Melrose Avenue. We found free street parking on North Orlando Avenue nearby. I really liked the vibe of Alfred Coffee on Melrose Place and they had nostalgic Lisa Frank cup sleeves. Melrose Avenue was perfect for taking pictures! We headed up and down the street so I could take pictures of the pink building, the famous wings, “Made in LA” wall, comedian wall by the Improv, the Marilyn Monroe portrait and much more!

Marilyn Monroe on Melrose | Teamtravelsblog
Melrose Avenue Street Art | Teamtravelsblog

From here we spent two days around Santa Barbara and the Pacific Coast Highway. Check out my next article to read more about that part of the trip. On Monday afternoon, we returned to Los Angeles and drove to the Griffith Observatory. The Observatory was closed, but we paid $4 to park and take in the view from here. The Observatory is beautiful and the walk around the building is superb! Even with some light fog, we still got some great shots of the skyline. You’ll get another chance to see the Hollywood sign. We also spotted a mom and two baby deer wandering around.

With a few hours left on our trip, we returned to the Venice Canals. We parked for free on N. Venice Boulevard near the LA Public Library. Since we made it before sunset, the lighting and reflections were perfect! The houses are all really unique and beautiful. Lots of people own little boats and we even saw a flamingo paddle boat!

Venice Beach | Teamtravelsblog
Venice | Teamtravelsblog

We walked back to Venice Beach and found ourselves having a completely different experience from our first one. Venice was a happening place! We found amazing street art along the strip and closer to the water. I ate the most amazing classic cinnamon and salted caramel bread pudding from Espresso Yo’self. The skate park is a must see! Watching the skateboarders is completely mesmerizing as they dodge one another, flip their boards and stick their landings. By 5 p.m. the sun had set and the sky changed to the most magnificent colors. I couldn’t put my camera down!

Before we knew it, it was time to return our car to Payless, shuttle to the airport and fly home on the red eye flight. California is incredible and we will be back! Remember to check back to read about our two days around Santa Barbara and the PCH.

Sunset on Venice Beach | Teamtravelsblog
Venice Beach Sunset | Teamtravelsblog
Venice Beach | Teamtravelsblog


Cluster your day around Custer

Sunrise at Custer State Park | Teamtravelsblog

South Dakota amazed us! Sylvan Lake and a drive along the Needles Highway in Custer State Park shouldn’t be missed! Jewel Cave National Monument is incredible and different from nearby Wind Cave. Our whirlwind three day trip wraps up here with a pit stop in Cheyenne and Denver too!

South Dakota Trip Highlights on Sunday, October 29, 2017

  • The animals – elk, bison, pronghorn, white-tailed deer
  • Jewel Cave National Monument
  • Crazy Horse Memorial
  • Custer State Park – Sylvan Lake and Needles Highway
  • Cheyenne, WY – Paramount Café, Big Boots
  • Denver, CO – 16th Street Mall

I woke up super early, so I decided to get our day started. We headed for 16A (road name) from Rapid City, South Dakota so we could get on Iron Mountain Road. I read online and I was told that Iron Mountain Road was a windy road into Custer State Park that offered cool one lane tunnels. There were a few benefits of going before the sunrise: 1) The night sky is visible and filled with stars; 2) Not a single other car on the road; 3) Tons of deer. The road has a few pull offs and eventually connects in with the Wildlife Loop of Custer State Park by the visitor center. This was great for us because we arrived to the Wildlife Loop right around sunrise (sunrise time: 7:25 am) and the perfect time for animal viewing.

Bison
Bison on the Wildlife Loop | Teamtravelsblog

As we began our drive from east to west, we saw two male elk in the distance. As we watched them, they ultimately approached the road and crossed the street in front of us. Talk about good timing! Throughout our drive, we saw many buffalo and some white-tailed deer too. The highlight though was when we saw four pronghorn on the side of the road. I’m really happy they weren’t scared off by our car because we were able to get some great photos and video!

From the Wildlife Loop we headed through Custer to get to Jewel Cave National Monument. The entire time drive is through the Black Hills National Forest, which in and of itself is beautiful. Jewel Cave is often compared with Wind Cave since they’re only about 45 minutes apart from each other. In my opinion, the two caves are quite different and both worth a look. We took the 10 a.m., 80 minute Natural Tour ($12/person). The size of the cave, which is ranked #3 in the world, feels enormous compared with Wind Cave. There are incredible stalactites (icicle-shaped and hang from the cave) and stalagmites (generally under the stalactite and formed from the water dripping). While Wind Cave is known for its boxwork, the stalactites and stalagmites are more abundant in Jewel Cave.

"Bacon" at Jewel Cave
“Bacon” at Jewel Cave | Teamtravelsblog

There’s also a really amazing formation known as “bacon”, which legitimately looks like the world’s biggest bacon strip found in Jewel Cave. We found the tour to be worthwhile and also enjoyed a peaceful “Walk on the Roof” above ground.

After leaving Jewel Cave, we headed back to Custer to check out the Crazy Horse Memorial. Crazy Horse is not an animal, but rather a Native American leader of the Lakota tribe. This Memorial is not a finished work, but rather a work in progress that was started in the 1940s.

Current Crazy Horse Memorial
Crazy Horse Memorial | Teamtravelsblog

If you pay the $12/person, you gain access to a very large museum of Native American history. We found the 23 minute video to be really informative and it talks about the history of the Memorial as well as the continued work. It turns out that a Native American, known as Standing Bear, approached Korczak Ziolkowski, a Polish man to take on the creation of the Crazy Horse Memorial. Mr. Ziolkowski also happened to be a Mount Rushmore sculptor. Since his passing, his family created a foundation that continues to work on the Memorial and the museum offers a large scale statue of what they expect the final Memorial to look like.

Crazy Horse Mini Version
Crazy Horse Mini Version | Teamtravelsblog

You can definitely get a view of the Memorial without entering the Crazy Horse Memorial area. This may interest you, especially since it’s another $4 if you want to take a school bus closer to the Memorial, which is an active construction site. Nevertheless, we both learned a lot in our short visit.

From here, we knew we wanted to try to see Sylvan Lake in Custer State Park and drive along the Needles Highway. As we drove toward the Sylvan Lake Entrance, we saw some enormous longhorn cattle. Past the Custer State Park pay station, there is a parking lot for Sylvan Lake. This lake is an absolute hidden gem – it’s beautiful! While it was very cold out, we braced it to take a short walk by the lake which boasts enormous rocks.

We then followed the signs for the Needles Highway. It’s a very windy road, has an 8-foot wide tunnel that I was sure we wouldn’t fit through and views similar to what you’d experience at Zion National Park. This part of Custer State Park could definitely be a national park – it’s incredible! One curve after the tunnel, we saw a man with binoculars pulled over. We joined him and after our eyes adjusted, we realized he had spotted mountain goats blending into the side of the mountain. What a treat! If we come back, we will definitely spend more time exploring here.

We hit the road to start our ride back to Denver, Colorado. The drive is beautiful and you can enjoy fast speeds and see animals like horses, cows and bison on both sides of the road. It was a few hours before we made it to Cheyenne, Wyoming. This is the capitol, but unfortunately their state capitol building was under construction so we didn’t get a good picture of the building or a chance to tour the inside. A few minutes up the street we found free parking and walked to the Paramount Café located at 1607 Capitol Avenue so I could get a coffee treat.

Paramount Cafe in Cheyenne
Paramount Cafe in Cheyenne | Teamtravelsblog

This place was decorated for Halloween and I ordered a Casa Bonita (honey, cinnamon + vanilla latte) from their “super secret menu”. This is one of the most reasonably priced coffee shops I’ve been in to, which is probably a little insight into the cost of living here.

Up the street from the Paramount Café, you can discover a few of the “Big Boots of Cheyenne”. There are a few around the Depot Plaza and Museum. Even the clock on the old train station was decked out for Halloween with an orange color and cat-like eyes. This was a good pit stop on our journey back to Denver. Since we made surprisingly good time, and it was Sunday, we found a free parking spot on Champa Street only a few blocks from the 16th Street Mall. You’ll have to read about our previous and more complete Denver experience in another blog post.

"Big Boot" at Cheyenne Depot Plaza
“Big Boot” at Cheyenne Depot Plaza | Teamtravelsblog

We returned our rental car and made our red eye Frontier flight without issue. This concludes our incredible three day adventure in South Dakota with a side of Cheyenne and a sip of Denver. We hope you’ll follow us to our next adventure!

The Baddest Lands Around

Wake up at Custer State Park and then enjoy all that the Badlands National Park has to offer! We loved seeing so many animals in their natural habitat. One of the biggest highlights was seeing two male big-horned sheep fight!

South Dakota Highlights on Saturday, October 28, 2017

  • The animals – elk, bison, swift fox, deer, badgers, prairie dogs, big-horned sheep
  • Sunrise along the Wildlife Loop at Custer State Park, drove west to east
  • Wall Drug for coffee and a donut
  • Badlands National Park – Door, Window, Notch and Cliff Shelf Trail
  • Badlands National Park – Big Badlands, Yellow Mounds and Pinnacles Overlook
  • Rapid City – Art Alley and president statues

We woke up excited to find more animals. If our day visiting Wind Cave National Park was any indication, we were going to be in for a good day. It was a very short drive from our lodge to the Blue Bell entrance onto the Wildlife Loop of Custer State Park. The first animal we came across was an entire herd of elk! To top it off, the elk were bugling (this is the sound they make)! We were completely mesmerized.

Elk in Custer State Park
Elk in Custer State Park | Teamtravelsblog

Once the herd moved along, we did too. We continue along the loop until we came across four bison grazing near the road. As we watched them, they began to walk toward our car. Was I scared? Uh yea, a little! The bison watched us to make sure it was safe to cross the road behind our car, which was a great opportunity for more pictures and video.

Driving through Custer State Park is a must on your visit to South Dakota! As we continued, we saw an endless gang of bison.

Bison at Custer State Park
Bison at Custer State Park | Teamtravelsblog

The sunrise was beautiful as the day began to break. We also found tons of deer by the visitor center at the I-36 intersection. This is the best map I found if you want to follow along: https://gfp.sd.gov/state-parks/directory/custer/docs/custer-map.pdf We exited the park on I-36 east and continued to spot bison. We used this exit so we could easily get on to I-90 toward Wall Drug and the Badlands National Park. Wall Drug was about a 75 minute drive.

From the moment you get on I-90, where you can drive 80 miles per hour, you’ll start to see hokey advertising for Wall Drug. Mike was skeptical, but I was determined to stop here and try their 5 cent coffee and famous donuts! “Wall Drug” is the name of the store, which is located in Wall, South Dakota. The maple donut was delicious and the coffee was good – who can beat 5 cents? If you have a few minutes to spare, check out the backyard’s giant jackalope for a photo op. In less than 30 minutes, we had arrived at the Badlands National Park. We were thankful, yet again, to have our Annual National Park Pass for $80, since this park currently costs $20 by car.

Our first stop in the park was the Big Badlands Overlook. Make sure to take note of the details on the mounds and stay alert for rattlesnakes. Luckily, throughout our entire day in this park, we did not see a rattlesnake. Needless to say, I would have flipped out if we did!

Big Badlands Overlook | Teamtravelsblog

As we continued, there was a large parking lot that had the trailhead for the Door Trail, Windows Trail and the Notch Trail. We started with the Door Trail, which begins with a nice boardwalk and then offers yellow numbered poles to follow to the “End of Trail” sign. It’s about 0.75 miles round-trip and a good hike to immerse yourself in the park. We learned here that it was named “the Badlands” by the French who called it “Les Mauvaises Terres” because the land was difficult to traverse. The Window Trail was super short and has a pretty view. One of the big highlights for us was the Notch Trail! The trail starts off easy as you’re following the poles to stay on the trail. Then you arrive at a wooden ladder and have a choice. We opted to climb the wooden ladder because it’s part of the adventure! Once at the top, you follow along some steep cliffs, may have some challenges finding a pole to follow and eventually make it to the end which overlooks the Cliff Shelf Trail. We met two really nice cross-country travelers here and swapped stories about our favorite national parks and must sees! The Cliff Shelf Trail was another short and beautiful boardwalk trail with stairs.

Notch Trail
Notch Trail | Teamtravelsblog

If you want to follow along or plan out your trip, click here for a good, free map of Badlands National Park.

Since we were at the Badlands during the off-season, the Ben Reifel Visitor Center was the only visitor center open. It has real facilities and a place to fill your water bottles. To date, we’ve found that all of the park rangers we’ve met offer great advice. He recommended that we drive the Wildlife Loop Road for our best chance at seeing wildlife and that we continue onto the unpaved road called Sage Creek Rim Road in order to see bison, prairie dogs and potentially other animals. He also advised that people were reporting big-horned sheep near the Conata points of interest on the map. We also learned that the Badlands is a free hike park, so you can hike anywhere, but they strongly recommend following an existing buffalo path since this animal always takes the path of least resistance. You’ll know a buffalo path when you see one.

While we stopped for some pictures of the scenery, our first major stop was the Yellow Mounds Overlook. I don’t know why, but the color yellow that twinkles in the light reminded me of the yellow brick road from The Wizard of Oz.

Yellow Mounds Overlook
Yellow Mounds Overlook | Teamtravelsblog

We met a bike rider who thought he spotted a big-horned sheep, so we got in our car and followed him. We turned onto Conata Road and sure enough, there were tons of big-horned sheep! It felt like we hit the jackpot when the two males started butting heads!

We were completely mesmerized as we watched the female big-horned sheep graze and the males continue to fight off and on. As the next 30 or 45 minutes unfolded, there became a clear winner, the dominant male who rejoined the rest and left the inferior male to lick his wounds.

Before turning onto Sage Creek Rim Road, we found two young big-horned sheep in the Pinnacles Overlook parking lot. Have your camera ready on the Sage Creek Rim Road. As we were driving, we saw a swift fox cross the road with a prairie dog in its mouth! We opened our windows and the prairie dog town was going crazy! They were so upset that one of their own was kidnapped! Mike had a really good eye and spotted a badger! We’d never seen one of these before. The badger was on the hunt for a prairie dog itself. This badger interrupted another badger keeping quiet that appeared to have a better strategy than the first one. It was interesting as we scanned the land, there were no prairie dogs nearby, as they had all disappeared into their mounds and had clearly taken note of the badgers lurking. As we continued on the drive, we saw bison and a few loner big-horned sheep. If you’re looking for a specific place with prairie dog (even though they’re everywhere), check out Roberts Prairie Dog Town.

If it isn’t obvious, Badlands National Park is incredible!

We returned to the Pinnacles Overlook to watch the sunset. The light illuminates the landscape in a magnificent way. We also saw another big-horned sheep grazing. As dusk set-in, we drove back toward the Yellow Mounds Overlook and saw tons of deer on the side of the road. Make sure to be careful and drive with your high beams when you can. We exited the park at the Pinnacles Entrance which was about 9 miles to the interstate. We saw more deer along this drive then we saw people in Badlands National Park!

Sunset at the Pinnacles Overlook
Sunset at the Pinnacles Overlook | Teamtravelsblog

Mike drove us safely to the city called Rapid City in South Dakota, while I took a nice warm car nap. The parking on Main Street was free and made it right before 7 p.m. I wouldn’t go out of your way, but if you have 30 minutes or so to spare, it’s fun to check out the various president statues and Art Alley (by the Alex Johnson Hotel) all within walking distance. Art Alley has some cool graffiti. We found statues of FDR (note the cane behind the podium), Calvin Coolidge and Chester Arthur to name a few. Since it was in the 50s, we found a safe place to carsleep for the night.

Art Alley in Rapid City
Art Alley in Rapid City | Teamtravelsblog

I hope you’ll check back with us soon to hear about our Sunday travels. They include more Custer State Park highlights, Jewel Cave National Monument, Crazy Horse Memorial and some incredible drives around and through the Black Hills National Forest. I would love to have you follow us on Instagram if you enjoy our photos and content!

Wind Cave is Rushmore than a Cave

Wind Cave National Park and Mount Rushmore National Memorial are must see places on any visit to the western part of South Dakota! If you’re an animal lover, we hope you get to see bison, coyotes, prairie dogs, pronghorn and mountain goats like we did!

South Dakota Highlights on Friday, October 27, 2017

  • The animals – bison, coyotes, prairie dogs, mule deer, pronghorn, mountain goats
  • Rankin Ridge trail (1 mile loop) at Wind Cave National Park
  • Wind Cave natural entrance tour
  • Boland Ridge trail at Wind Cave National Park
  • Mount Rushmore National Memorial

We arrived to the Denver airport on Thursday night around 11 p.m. on a last minute, direct Frontier Flight for $97! For our three day trip, we found a car with Payless Car Rental for under $70. I love using CarRentals.com for great, last minute deals! Have I mentioned before that we’re carsleepers? Well, we are and we love it! We spent the night in the Walmart parking lot in Fort Collins, Colorado about an hour away and then headed to Wind Cave National Park (another 4 hours) in South Dakota very early in the morning. Through our travels, we’ve learned to be light packers and filled one of our two personal items with two blankets.

We entered the park from I-385 intending to find the visitor center, but turned onto I-87, which was not the right way. It was meant to be though because we got some great views of bison. We found a few bison almost instantly upon turning onto the road and then two more up the road at Lookout Point Trail. Here’s a map of the park if you want to follow along: https://www.nps.gov/wica/planyourvisit/upload/WICAmapBrochure.pdf

As we continued along I-87, there are two narrow bridges. After the second narrow bridge, we drove about another mile or so before we pulled off to the side. Stay alert because it turned out we had parked by a prairie town! A prairie town is literally grasslands with adorable prairie dogs and their homes.

Prairie Dog at Wind Cave
Prairie Dog at Wind Cave | Teamtravelsblog

Since it was so quiet, we could hear them chirping to each other and enjoyed watching them eat and pop in and out of their mounds. From here, we turned around, made it back to I-385 and found the visitor center. On the drive up to the visitor center, again, there are TONS of prairie dogs to see. If you have an interest in touring the “Wind Cave”, it’s a good idea to buy your ticket early (we were told they’re refundable). We bought our tickets ($5 per person) for the Natural Tour for the 1 p.m. tour and got advice on places to see from the extremely helpful ranger. Since we had a little less than 3 hours before the tour (we barely missed the 10 a.m. tour), we drove back up I-87 to Rankin Ridge. It’s a relatively easy 1 mile loop that gets you to the highest point in the park. While on our hike we saw a mule deer (keeping our streak alive with this being our 7th national park in a row of spotting a deer) and some beautiful views of the park. Traveling on the off season has some huge advantages – we didn’t see a single other person!

Coyote on I-87
Coyote at Wind Cave | Teamtravelsblog
Rankin Ridge at Wind Cave National Park
Rankin Ridge | Teamtravelsblog

On our drive back down I-87, we looked up and saw a coyote slowly crossing the field! As we followed the coyote, we spotted a second coyote! How cool is this? I took this picture from a bit of distance with my Nikon Coolpix L340*. We also found the same bison from earlier in new positions by the Lookout Point Trail and near the intersection of I-87 and I-385. While on the main road (I-385), we drove past the visitor center and found tons of bison on the side of the road. We were in picture heaven! As we approached Gobbler Pass, we spotted a coyote (our third one)! We stopped and watched the coyote walk by two bison, completely uninterested in each other. What was interesting was listening to the prairie dogs going crazy and warning each other!

We turned around because we didn’t want to exit the park and used the map to find the tiny pull off (for about 3 cars) at the Cold Brook Canyon trailhead. It was a peaceful walk, with tons of bison remnants to watch for as we stepped.

Bison and Coyote
Bison and Coyote | Teamtravelsblog

We returned to the visitor center for the 1 p.m. tour. Wind Cave recently became the 5th longest cave in the world (up one spot from #6). The ranger who served as the guide was super passionate and started by showing us the natural entrance. It’s really small! The park measures the barometric pressure so you can see whether the wind is blowing into or out of the cave. The highlight was entering the room at the end dubbed “The Post Office” which has beautiful boxwork (the cave is famous for this). The cave was definitely worth the $5!

We found the park map to come in handy. From I-87 we turned onto NPS-5. This is an unpaved road, but easy to drive. Along the drive we saw lots of prairie dogs and some pronghorn. We got to the intersection of NPS-5 and NPS-6 where we turned and found the small lot for the Boland Ridge trail. Again, we had to watch our step for animal remnants, but we also wanted to enjoy our surroundings. We came across a band of pronghorn. They watched us like hawks and it was fun to watch them jog away considering they’re the fastest animal in North America. We also found many more bison in this area. Wind Cave National Park impressed us!

Pronghorn at Boland Ridge
Pronghorn at Boland Ridge | Teamtravelsblog

We drove almost an hour out of the park, through Custer (where there are gas stations) and onto Mount Rushmore National Memorial. As we were approaching the parking entrance, we spotted deer grazing and two mountain goats! As we looked up from the mountain goats, we realized they were perfectly in front of the presidents’ heads!

Mountain Goat at Mount Rushmore
Mountain Goat at Mount Rushmore | Teamtravelsblog

We took advantage of the photo opportunity and then continued to the parking lot. We fully expected to pay about $11 for the parking structure, but there were no attendants when we entered shortly after 5 p.m. We parked for free and began our walk up to the memorial. The walk is beautiful. As you walk the Avenue of State Flags, you can get a picture with your home state and notate the day it became a state.

Mount Rushmore
Mount Rushmore | Teamtravelsblog

There is a large viewing area as well as steps down to another viewing area to see Mount Rushmore. Since we arrived before sunset (sunset time: 5:51 p.m.), we enjoyed the memorial in the natural light and then stayed past 6 p.m. to see the illuminated memorial which was also cool. While this place may be crowded in the summer, there were minutes at a time where we had the entire place to ourselves!

We got a great tip from the gentleman in the Mount Rushmore store. After leaving the memorial, we followed the signs for the “Profile View” where you can park and get pictures of George Washington’s profile. Since the evening temperatures were set to fall into the 20s, we opted to find a last minute hotel deal. I am a huge fan of Booking.com*. We found a highly rated lodge called Calamity Peak Lodge for under $60 in Custer. If you’ve never used Booking.com* before, I would encourage you to use my link* so we can each get $20 when you book. The lodge was really unique inside with wooden walls, clean and had all of the normal amenities. The owner was extremely nice and met us as soon as we called to check us in. I would definitely recommend this place.

As we have in previous trips, we decided to call it a night at a reasonable time so we could wake up with the birds and go searching for animals by sunrise! Check back with us to read about the animals we found in Custer State Park and the Badlands National Park on Saturday!

Bison at Wind Cave
Bison at Wind Cave | Teamtravelsblog

Park’d in Chicago

Chicago Skyline | Teamtravelsblog

An inexpensive weekend getaway to Chicago to walk along Lake Michigan, take in the skyscrapers on the Chicago River, see the polar bear playing and drink the  coffee treats. Plus Chicago offers so many parks!

 Chicago, Illinois Highlights for Sunday, October 8:

  • Millennium Park and the Bean
  • Walk along Lakeshore path
  • Navy Pier
  • Lincoln Park Zoo – the polar bear
  • Dropshot Coffee & Snack Bar

Let’s start off by stating two important facts: 1) We slept in a Wal-mart parking lot and 2) we managed to get 61,204 steps by the day’s end. We arrived the morning of the Chicago marathon, so not surprisingly, many streets were blocked off and my initial parking plan was not going to work. We were SUPER lucky and stumbled upon free parking on Lincoln Avenue not too far from Lincoln Park.

We walked a few miles before arriving at Grant Park, which was closed for the marathon, so we started down Michigan Avenue and I bought a unique pour over coffee at Fairgrounds Coffee. As a bonus, this place had a nice bathroom. We wandered across the street to Millennium Park and the Bean. Walking around and through the Bean, posing for selfies was fun as you can get some awesome reflection pictures with the skyscrapers in the backdrop. We made our way from here to Maggie Daley Park where we saw the rock climbing walls and then to Lake Michigan along the Lakeshore path. Chicago 1Renting bikes probably would have been a great idea, but we chose to walk the path up to and around Navy Pier before continuing to the Lincoln Park Zoo.

The zoo is incredible and it’s free! The zoo was beautifully decorated for the fall season and the animals were lively in the warm weather. The polar bear playing in the water with its toys was an absolute highlight. Check out my video on Instagram. The macaque monkeys were also very playful to watch and there were babies! Baby animals of any kind are always top notch in my book! Chicago 2Another notable animal included the pygmy hippo, which you can see a video of its snack time on my Instagram as well. There were other large animals like double-humped camels, rhinos and big cats. I was bummed not to see the red panda, which is my favorite animal, but this just means I will have to return to this zoo in the future. We exited on the west side of the zoo, regrouped for a bit and then made our walk up Michigan Avenue.

I was craving a second coffee treat of the day, and read good reviews about Dropshot Coffee & Snack Bar. The decorations were incredible – it’s a sports themed coffee shop! There’s everything from bleachers to a scoreboard on the wall and the prices were reasonable. Don’t leave without checking out the lower level which looks like a pool and has lots of games, plus clean bathrooms. Chicago 3Michigan Avenue was fun to walk along, full of people, especially marathon runners sporting their completion medals. It was pretty exciting to learn that an American won the men’s marathon earlier in the day. One thing to note about Michigan Avenue is the stores close around 7 pm on Sunday nights.

Chicago, Illinois Highlights for Monday, October 9:

  • Buckingham Fountain in Grant Park
  • View from the BP Bridge between Maggie Daley and Millennium Parks
  • French Market
  • View of the city from Adler Planetarium
  • Wicker Park (The Wormhole Coffee)

We got lucky again and found an amazing, free parking spot near the location of the Maxwell Street Market (which I don’t recommend). We walked a little under a mile to Grant Park and found the most magnificent fountain, Buckingham Fountain. The park was pretty desolate with remnants of the marathon from the day before. We walked through the park and smelled some beautiful roses before coming to the BP Bridge between Maggie Daley and Millennium Park. The BP Bridge is about 925 feet long and is a great viewing point for the city’s skyscrapers. Chicago 4We took a few more Bean (aka Cloud Gate) pictures and then started our walk along the Chicago River from the Michigan Avenue entrance. Chicago 5The skyscraper reflections, public art and river pathway make this a great stroll. We loved stumbling across the oversized deer statue.

After the river, we headed to the French Market which is inside the train station. It’s about 30 booths with delicacies like macaroons. Whether you plan to eat or not, it’s a neat place to check out. From here we took a rather lengthy walk along Michigan Avenue, past Millennium and Grant Parks to the museum area by Shedd Aquarium (highly recommend) and the Adler Planetarium. I cannot recommend this view of the city skyline enough! You can see Navy Pier in the distance and get a full view of the city skyline to include the Willis Tower. Lots of people were picnicking in this area.

We walked back to our car and drove about four miles to Wicker Park. The first time we had to pay for parking, but fortunately it was only $2 per hour and we were there less than two hours.

Chicago 9

We went into The Wormhole Coffee, which is a nostalgic coffee bar filled with Gremlins, Bowser in his castle, Ninja Turtles and E.T. stuff among lots of other things. It’s pretty expensive, but unique. I loved the “Cool But Rude” latte that I got made with fresh ginger and curry sauce. We wandered through the park and on our way back to Milwaukee Ave., I spotted Andre Royo, the man who played Bubbles in the television show The Wire and Thirsty in the show Empire.

Chicago 7

He was extremely down to Earth, chatted with us for a few minutes, and took an awesome selfie! Keep your eyes peeled for the street art around Wicker Park that shouldn’t be missed!Chicago 8

Since we still had about two hours of vacation before returning our rental car, we drove to the Magic Hedge Bird Sanctuary. There’s nothing too noteworthy here, except for another nice place to view the city skyline and it connects in with the Lakeshore path. Then right outside the airport, we parked at Robinson Woods South. It’s a park where we spotted over 9 deer grazing close to dusk. It’s also a good place to view planes that have just taken off from the Chicago O’Hare airport. Our car rental return and ride home on Spirit Airlines were uneventful, which is the way we like it.

Chicago is a world class city and we will definitely be back. What did we miss and should plan to do next time?

Wisc’d Away Before Chicago

Wisconsin State Capitol | Teamtravelsblog

Madison and Milwaukee, Wisconsin are two great cities around the corner from Chicago worth jumping in the car to see over the course of a day. The State Capitol in Madison is the second tallest and offers a 360 degree view of the city!

Madison, Wisconsin Highlights for Saturday, October 7:

  • University of Wisconsin-Madison
  • Michelangelo’s, coffee shop
  • Market in Capitol Square (Saturdays only)
  • State Capitol rooftop
  • State Street
  • Thai Pavilion in the Olbrich Botanical Garden

As soon as we arrived at Chicago O’Hare (ORD) airport at 7 am, we took the Budget-Avis shuttle to get our rental car and hit the road for Madison, Wisconsin. Luckily, I found an amazing car rental deal through CarRental.com days before our trip (under $72 for 3 days)! The fastest route is taking a toll road, so having cash is key! It cost less than $10 across 4-5 toll booths which are located on the right side of the road when it splits. When we arrived in Madison, we drove through the University of Wisconsin-Madison campus, which is beautiful! One amazing thing is there is tons of free parking on campus during the weekends and it’s walking distance from all of the sites. Click here for a list. We parked in “Lot 26” which was along the main road, directly outside the Observatory and had a front row view of Lake Mendota.

We walked down to the lake and over by the Memorial Union Terrace. There are lots of nice boats docked and seating to take in the scene. You can also pose for a picture with UW’s mascot, the badger. Madison 1We walked along Langdon Street to see a lot of Greek houses before making our way toward Capitol Square. I spotted Michelangelo’s, an artsy, large coffee shop which has two entrances. Madison 2The specialty menu is really unique as it’s made up of drinks created by current and former employees. I tried the “espresso miel” which was a latte of honey and cinnamon that I enjoyed!

On Saturdays, there is a large market (Dane County’s Farmers Market) that starts early and usually ends by 1:30 pm in Capitol Square. This is the area that surrounds the State Capitol, which is the second tallest one in the U.S. (behind Louisiana). While I didn’t have a chance to try it myself, Stella’s Bakery is a popular offering. Exploring the Capitol is a must! The rotunda is beautiful, you can explore on multiple floors (with or without a guided tour) and the bathrooms are clean. Plus, it seems like a well-kept secret, but you can find the spiral staircase to the rooftop and enjoy a 360 degree view of Madison for free. This was a highlight for us. From here, walking along State Street is ideal as there are lots of shops, restaurants and bars before you return back to UW-M’s campus. If you’re a bookstore person, definitely check out A Room of One’s Own.

Once you’re back at your car, take the 15 minute ride to the Olbrich Botanical Gardens.

Madison 3

It’s free to walk around and there’s a beautiful Thai Pavilion that was donated by the Thai government.We accomplished this itinerary and a few other spots in about 5 hours. If you have more time, some other ideas would be to rent bikes and explore the lakes along the paved bike paths, take in the view of the city from Olin Park or check out the places along Williamson (“Willie”) Street.

Milwaukee, Wisconsin Highlights for Saturday, October 7:

  • Milwaukee Public Market
  • Milwaukee Riverwalk and Art
  • View from Veterans Park

The drive from Madison to Milwaukee was very easy, under 90 minutes and toll free. It was raining when we arrived, but stopped shortly after. We found free parking near Van Buren and Michigan Avenue. The location was great because it was walking distance to the Milwaukee Public Market in the Historic Third Ward.

The market is small, but has a good variety. I tried the bee at Anodyne, saw the around the world market clocks and got a classic picture of the “Milwaukee Public Market” sign.

Milwaukee is very walkable and it’s only a few blocks to the Milwaukee River. All along the river you’ll find public art such as Rosie the duck, the Bronze Fonz, a statue of Arthur Fonzarelli from Happy Days and other artistic pieces. Milwaukee 3I recommend timing your walk close to sunset so you can enjoy the colorful sky and reflections on the water. We were particularly lucky because a little boy called out a rainbow that appeared near the duck family statues.

Milwaukee 5

Break from the main path to see the Old World Third Street. Before starting our drive to Chicago, we drove to Veterans Park for a short walk which has a lovely view of the city and would also be a great place for the sunset along Lake Michigan.

Be sure to check out my next entry on our two days in Chicago that followed.

Moose, Elk and a Black Bear, Oh My!

Rocky Mountain National Park in Colorado can’t be missed. If you can travel from Grand Lake on the west side to Estes Park on the east side, you won’t regret it! On our journey from west to east we saw moose, elk and a black bear!

Rocky Mountain National Park Highlights on Monday, September 4 and Tuesday, September 5, 2017

  • The animals – moose, elk, black bear, Stellar’s Jay (bird)
  • Adams Falls (west side)
  • Continental Divide (middle)
  • Many Parks Curve Overlook (middle/east side)
  • Alberta Falls (east side)
  • Bear Lake (east side)

I had done all of the driving up to this point of the trip and as we were leaving Maroon Bells, it finally caught up to me. Mike’s foot was starting to feel better, so he offered to drive us to the Grand Lake entrance of Rocky Mountain National Park (RMNP). While I-70 east was easy, cruise control driving, the way the GPS took us to RMNP was insane! It was up and down a mountainside, narrow roads, and quite honestly, made my heart skip some beats. Luckily, it didn’t snow or rain, so we made it to the RMNP without incident. We started our trip with the traditional “National Park” sign and then drove by the lodge to get a picture and view of Grand Lake. If you have a few minutes to spare, it’s worth parking in the lot and seeing the beautiful lake.

View of Grand Lake from the Lodge
View of Grand Lake from the Lodge | Teamtravelsblog

You’ll start to contemplate your existing retirement plans and see yourself here. It is so peaceful! Again, make sure you have the Annual National Park Pass for $80 or risk spending $30 just for this park. If you want a map of the park, here it is: https://www.nps.gov/romo/planyourvisit/upload/ROMOmap1_small.pdf

From here, we stopped at the Kawuneeche Visitor Center, where we made it in the door about a minute before closing. The park ranger was kind enough to give us a map and make a few recommendations. His best advice was to drive up and down the main street, especially at dawn or dusk for the best opportunity to see animals like elk or moose. He also heeded us that if we saw two cars pulled over, to go ahead and be the third, because this meant animals! We drove the main strip and pulled into a few of the points of interest, but we didn’t do any hiking until we got to the last pull off on the left, which was the Colorado River Trailhead. The first part of the walk is a bit steep, but then it’s quite level after that and has a main intersection that allows you to choose different trails. During one of the sections, we looked up and spotted an animal. We were so caught off guard that we ended up scaring the “elk-moose”, whatever it was, before we got a good look. We’re convinced it was a moose, but without our photographic evidence, we couldn’t say for sure.

As the sun started to set, we did as the ranger advised and drove the main strip. It didn’t take long before we saw groups of cars pulled over looking at herds of elk. We were lucky that people were willing to share their binoculars for better views and a park ranger was also present at one of the stops offering information about bugling (the noise that elk make). We didn’t get any elk close ups and didn’t see a moose, but we were exhausted and knew it would be a good idea to get some sleep so we could return to the main road before the sunrise. We filled the car with gas in Grand Lake and then we used Booking.com* to find a nearby, last minute hotel for the night. We stayed at America’s Best Value Inn-Bighorn Lodge. The receptionist office is not 24 hours, so make sure you check the closing time for any hotel you’re considering. We arrived at the receptionist office shortly before closing and got a nice, clean room. After two nights in the car and five out of the previous six nights, I was ready for a shower and a bed to rest my head.

Our plan worked! Early to bed and early to rise! We dropped our room key in the dropbox and were back on the main strip before the sunrise (sunrise was: 6:35 am). We couldn’t believe it – there were SO MANY UP CLOSE ELK! Male Elk
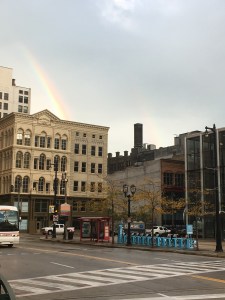
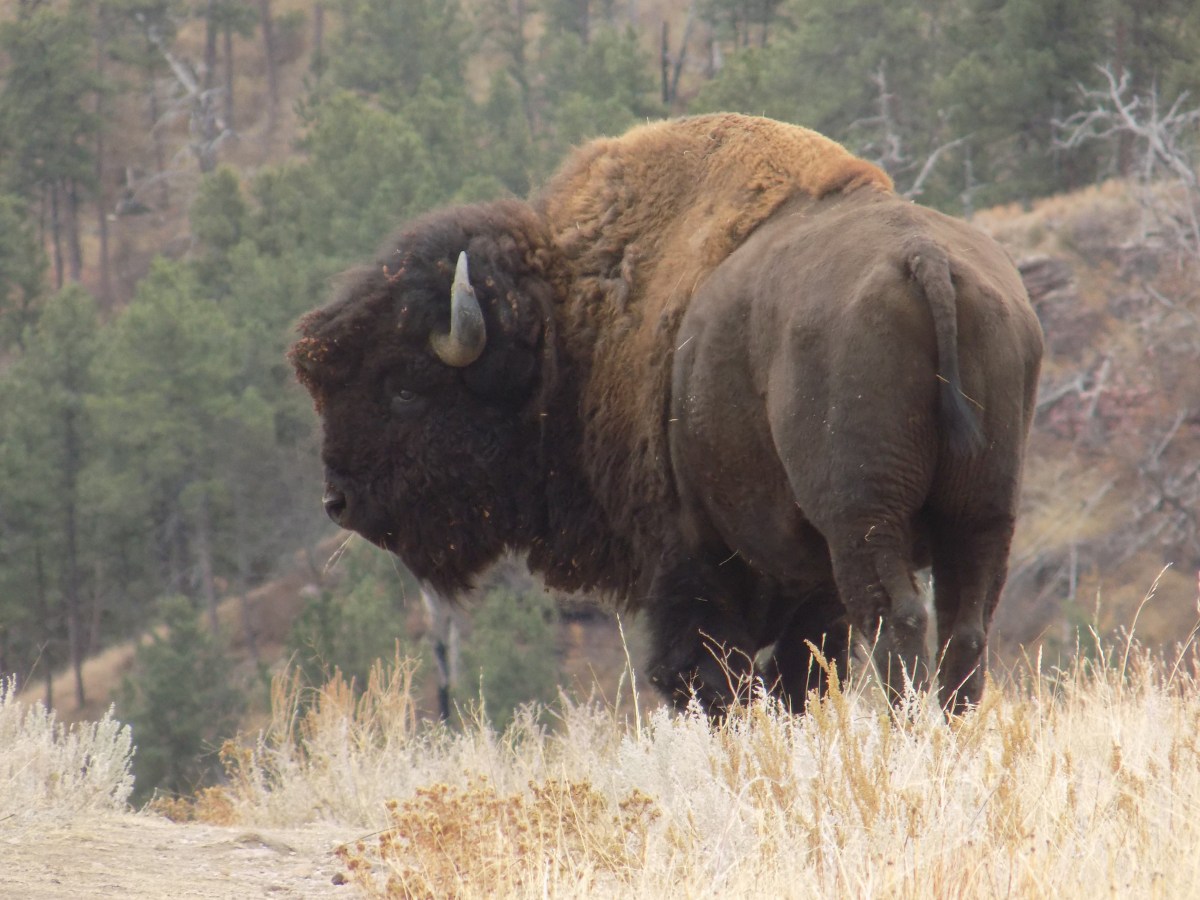
We had a blast stopping in the pull offs and on the side of the road to capture photos and video of the adult and young elk. We got some great ones of elk crossing the street and grazing on the side of the road.

Once we were satisfied with our elk experience, we drove back out of the park and to a separate section of the park where Adams Falls is located. You actually drive through part of downtown Grand Lake to get there. There’s a large parking lot, facilities and a short hike to a beautiful waterfall. We even got lucky and saw a deer here! As our seventh national park on this trip, Arches National Park was the only one where we didn’t come across a deer. I’m not sure if it was the time of day or if it was because it was the Tuesday after Labor Day, but we got the place to ourselves. We also got another wonderful view of Grand Lake.

Back in the car, we drove back into the rest of the park and past the Kawuneeche Visitor Center. We drove slowly, as we wanted to see animals. We saw a car pulled over and decided to go see what they were looking at. We were rewarded and saw a moose grazing. At one point, the moose even looked straight at us and I got some cool shots with my Nikon Coolpix L340*.

Momma Moose
Momma Moose | Teamtravelsblog

Just when we thought the show might be over, an adolescent moose appeared out of nowhere. Our car and the one in front of us, inched forward and then we got to see the momma moose cross the street and the adolescent one scurry across close behind. I was so happy that Mike was ready with the camera and got a video of the whole thing!

At this point, we were satisfied and started our drive to the tundra. On the way, we stopped to take a look at Lake Irene, which was pretty and the Continental Divide. By the Alpine Visitor Center, which was actually quite busy, we made the extremely windy and cold walk up the stairs on the Alpine Ridge Trail. There’s a sign at the top that says “elevation 12,005 feet above sea level” which makes for a good photo op. We continued our journey east through the park toward Estes Park. We made a few stops at places like the Lava Cliffs and Forest Canyon Overlook. While we were at Many Parks Curve Overlook and enjoying the panoramic viewing platform, we saw a group of people gathered and sure enough, they were looking at a black bear! It wasn’t super close, but luckily the zoom feature on my camera really helped us to get a better view.Black Bear

Continuing through the park, we followed the signs to Bear Lake. A huge sign said there were no parking spots and to take the shuttle, but we took our chances. We found a spot in the Bear Lake parking lot and hiked to Alberta Falls. This waterfall is incredible!

Alberta Falls in RMNP
Alberta Falls | Teamtravelsblog

There are huge rocks alongside it that you can climb on and find great places for selfies! From here, we went to Bear Lake and watched the birds. The blue and black bird known as Steller’s Jay was here and really beautiful to see. On our drive down from Bear Lake, we found another great opportunity to see male and female elk. We pulled the car over and took advantage of the photo opportunity.

We absolutely LOVED RMNP and will be back again! We made the easy 90 minute trip to Denver and I hope to tell you all about this wonderful city soon!

Steller's Jay by Bear Lake
Steller’s Jay by Bear Lake | Teamtravelsblog

My Aspen to Maroon Bells

Maroon Bells and Crater Lake are located in the White River National Forest near Aspen, Colorado. Both lakes are picturesque and shouldn’t be missed on your trip to Colorado.

White River National Forest Highlights on Monday, September 4, 2017

  • Maroon Bells
  • Crater Lake

We woke up early and on a mission! From my research, I knew we had to arrive at Maroon Bells before 8 am if we wanted a chance to park in the Maroon Bells parking lot. The drive through Aspen, Colorado on the way to Maroon Bells is beautiful. In the GPS, I used 76 Boomerang Rd, Aspen, CO 81611 to guide our drive, which I believe is a parking structure. Instead of stopping here, we continued along the road for a few more minutes until we came to a toll booth at the entrance of the White River National Forest. It was a definite bonus to learn that the Annual National Park Pass that I’ve written so much about works here too and saves you $10! Once we showed our pass and got a map, we followed the signs to the day parking where there were rangers who guided us to an open parking spot. We were parked by 7:30 am and thankful because the lot filled up quickly and if you can’t find day parking before 8 am, you have to park in the parking garage and pay for a shuttle. I found this site as well as this other site to be super informative as I was planning. From everything I had read, Maroon Bells is one of the most photographed sites in Colorado and after a visit, this is no surprise.

Maroon Bells
Maroon Bells | TeamTravelsBlog

The walk up to the lake, Maroon Bells, is incredible. In the morning, the reflections of the mountain on the water will fill up your iPhone memory space. I still can’t believe we were here. There were families posing by the lake, dogs being walked and kids laughing. There are a few different hikes you can take. We started off by walking around Maroon Lake on the Maroon Lake Trail and then continued to the Scenic Loop Trail. Take your time and remember to look up and behind you to really appreciate its beauty. Don’t miss the beaver dam either.

Start of the Scenic Loop Trail
Start of the Scenic Loop Trail | TeamTravelsBlog

We saw signs for Crater Lake Trail and decided to check it out. The map says it’s a 3.6 mile round-trip hike. The hike is a bit intense as it’s primarily uphill and there are different terrains, including sections that are rocky. There are different spots along the trail to “pull over” and let people pass you that are inclined to walk faster. We were tired, so we gladly let people pass as we made our way to the top. Once you clear the final trees at the top, there is a magnificent lake called Crater Lake.

Crater Lake
Crater Lake | TeamTravelsBlog

There are lots of logs you can sit on and enjoy your snack or lunch. Tons of ducks were relaxing on the logs in the water, while others were dipping their heads in the water for their own lunch.

The walk down was much easier than the hike up. As you make your way down, make sure to keep an eye out for the opening where you can get some good shots of Maroon Bells. There are also tons of lovely birch trees to photograph too.

Birch Trees in the White River National Forest
Birch Trees in the White River National Forest | TeamTravelsBlog

We probably could have stayed here all day, but we got to the car, where the parking lot had significantly emptied since the morning and made the approximately 3.5 hour drive to the Grand Lake entrance of Rocky Mountain National Park. This was recommended to us by the ranger at Canyonlands and we are so thankful we took her advice! When we saw Grand Lake, we started to reminisce about our time walking and biking along Lake Zurich in Switzerland.

Check out our article tomorrow about our evening and following morning exploring Rocky Mountain National Park before we round out our trip in Denver.

Mes-a-round with Canyonlands

Mesa Arch at Canyonlands National Park | TeamTravelsBlog

The Island in the Sky section of Canyonlands gives you views of the Colorado and Green Rivers, beautiful overlooks and unique points of interest like Whale Rock and Upheaval Dome. Of course, a stop here wouldn’t be complete without photographing Mesa Arch.

Canyonlands National Park Highlights on Sunday, September 3, 2017

  • Mesa Arch
  • Grand View Point Overlook
  • Buck Canyon Overlook
  • Upheaval Dome
  • Whale Rock
  • White Rim Overlook (sign reads “Hiking Trails”)

Sleeping in the car has its advantages! After the financial savings, the next biggest is once you’re awake, you can start moving right away without delay. We followed the GPS and took the most direct way from the Grand Canyon to Canyonlands. We retraced some steps by driving back through Kanab, passing Zion, Bryce and arrived across the street from Arches National Park after 5 hours. One thing to note is we lost one hour when we crossed back into Utah from Arizona. The other most important thing to note is the drive on I-70 is exhausting. There are signs reminding drivers to stay hydrated and to pull over if necessary. This road allows you to legally drive 80 mph! Make sure you have water and gas before making this long drive because there aren’t many options.

It is super important to know that Canyonlands has two completely different park sections and they are not close to one another. The section in the north that is relatively close to Arches National Park is called Island in the Sky (this is the section we went to) and the section in the south is called The Needles. Similar to the other national parks, it’s worth stopping at the Visitor Center to talk with a ranger, use the facilities and get a map. We experienced a cool small world connection here where the ranger’s son lives in Virginia and went to George Washington University for undergrad, which is the same school Mike and I attended for graduate school. If you want to check out a map ahead of your trip, here’s a good one: https://www.nps.gov/cany/planyourvisit/upload/canymap.pdf

We stopped at the most notable place, Mesa Arch first. Since we arrived in the early afternoon, it was extremely hot out so we loaded up with sunscreen and wore our hats.

Mesa Arch at Canyonlands
Mesa Arch at Canyonlands | TeamTravelsBlog

Mesa Rock is particularly popular for sunrise and sunset views, but it was nice even in the middle of the day. You can hike around the arch, pose for a picture in the archway or use the arch as a frame for what’s beyond. Once we were back in the car, we continued to the fork in the road and headed left. We popped out at the Orange Cliffs Overlook and then continued to the Grand View Point Overlook.

Grand View Point Overlook | TeamTravelsBlog

This is a great spot to catch a glimpse of the Colorado River and to try to find a car or two driving below you on White Rim Road. We found a white SUV that looked like a speck. On your drive back to the fork, Buck Canyon Overlook is another good point of interest if you want to hop out of the car and take a few pictures.

The main road wasn’t busy, so we drove back to the fork and headed left. We got out of the car at the Aztec Butte for a quick picture, but didn’t hike here. Instead, we drove to the end of the road and stopped at the Upheaval Dome. There are two theories about the upheaval dome – personally, I like the meteorite theory. If you’re interested in learning more, you can check out the NPS site.

Upheaval Dome | TeamTravelsBlog

The trail here is relatively short and has a moderate incline to a good viewing point. We followed the signs to the “First Overlook”, since that’s what the ranger at the visitor center recommended.

Retracing our drive, we stopped at Whale Rock on the left. This hike is not only extremely fun with excellent views from the top, but there’s also legit cell phone service from the top! If you want to quickly send or receive text messages, this is the place. The hike to the top isn’t too difficult, but paying attention to the cairns is important (stacked rocks that serve as guide posts), especially when it’s hot and easy to get disoriented.

Whale Rock shade | TeamTravelsBlog

Once you’re at the top, the large rocks provide some shade as well. Before the fork in the road, we stopped at the Green River Overlook for a view of the other river.

Since the ranger told us her favorite spot was the White Rim Overlook, we knew we had to go check it out. This is back on the original road as if you’re heading toward the Grand View Point Overlook, but it’s on the left and the sign only reads “Hiking Trails”. In other words, it’s well hidden until you park and find the trailhead sign that indicates the white rim overlook mile level walk is only 0.8 miles away. This place is so cool! There are huge imprints in the rock that look like dinosaur prints. This is another trail that requires paying attention to the cairns. We headed out close to sunset and were rewarded with incredible views. We had the place to ourselves, which was perfect, until the sun went down and we found ourselves here, in the dark, with only our dying phone flashlight to help us find the cairns.

Sunset at White Rim Overlook
Sunset at White Rim Overlook | TeamTravelsBlog

We were thankful when we made it back to the car and came across a deer on our drive heading out of the park. We stopped at the closed visitor center to refill our water bottles and found there were tons of bats guarding the entrance. This was a bit scary. We took our time driving out of the park, cognizant that animals could appear anywhere and made our way back to I-70 east toward Colorado. We drove about two hours to Parachute, Colorado where we found a good rest station for the night with the best restrooms we had seen in days. In other words, these flushed!

Come with us to the White River National Forest near Aspen tomorrow to see one of the most photographed places in all of Colorado – Maroon Bells! From here we will take you to the 7th and final national park of our trip!

The Grandest Canyon of Them All!

Sunset at the North Rim of the Grand Canyon | TeamTravelsBlog

Incredible viewpoints and hikes along the rim and into the Grand Canyon. Cape Royal and Bright Angel Point are among the points not to be missed on your day at the North Rim of the Grand Canyon.

Grand Canyon National Park Highlights on Saturday, September 2, 2017

  • Transept Trail, Bridle Path
  • North Kaibab Trail – hike into the Grand Canyon (Coconino Overlook, Supai Tunnel)
  • Bright Angel Point (near Visitor Center)
  • Cape Royal, Point Imperial

We woke up, ate our free breakfast at the Sun-n-Sand Motel* and then started our drive to the North Rim of the Grand Canyon. On our drive from Kanab to the Grand Canyon, we gained 1 hour by going through a time change. This was great because we arrived to the large parking lot at the North Rim Visitor Center soon after it opened at 8 am local time. As I’ve mentioned previously, we bought the Annual National Park Pass because without it this park costs $25. You can grab your maps, get a cup of coffee at the local coffee shop in the Roughrider Saloon or watch the morning sky change in the seats behind the Grand Canyon Lodge. This is a great site to help you plan your visit and links to a map: https://www.nps.gov/grca/planyourvisit/north-rim.htm

We started our day behind the Grand Canyon Lodge along the Transept Trail. If you’re bold, there’s an overlook you can walk out to for some great pictures. Grand Canyon 1This walk along the canyon rim is relaxing and takes you past birch trees, campgrounds and eventually crosses the street for Bridle Path. From here you will find the North Kaibab Trailhead. The downhill walk into the canyon is much easier than the steep return walk out of the canyon. It’s super important to bring lots of water, a hat and start early because it gets hotter the closer to the center of the earth you get. Our first stop in the canyon was Coconino Overlook. Binoculars or a good camera come in handy here. There’s also some shade if you bring a picnic lunch to eat here.

We continued our walk, being careful to watch every step so as not to step in large piles of mule manure. We also learned that mule riders have the right of way, so make sure to get to a good spot out of the way when they’re coming. Some of the mules take wide steps and you don’t want to get hit with a tail or stepped on! Grand Canyon 3We talked to nice volunteer who recommended that we stop at the tunnel instead of continuing to the Redwall Bridge because it was already 95 degrees at the Supai Tunnel. We heeded his advice and stopped at the tunnel. The walk through the tunnel is really cool and from the other side you can see the bridge, which is the next point of interest. Grand Canyon 2Dehydration here is a REAL thing, so bring water, Gatorade or electrolyte tablets* to have in your bag. Fortunately, there are restrooms and a water fountain (not very cold) at the tunnel as well as shady spots to sit and catch your breath. I really don’t know how the “rim-to-rim” runners do it!

We made it back to the top without incident and took the Bridle Path all the way back to the Visitor Center. By the parking lot, there were some amazing views into the canyon. Grand Canyon 4We continued by following the Bright Angel Point signs. This is not for the faint of heart as there are some very narrow parts, it can be windy and you’re high on the canyon rim. This was quite a popular spot.

Grand Canyon 5Next, we got into the car and drove to Cape Royal. This is an approximately 22 mile drive that’s one lane in each direction with minimal room for error. Soon after passing the Cape Royal sign, we were stopped mid-drive for deer and turkey playing in the street. We enjoyed this unexpected moment before continuing to the parking lot at the end. There is a lot to explore up here and if you time it close to sunset, you will not regret it. On one side we got to see the sun start to set, changing the colors on the rocks while on the other side, we saw a rainbow from the clouds over the canyon. Grand Canyon 6
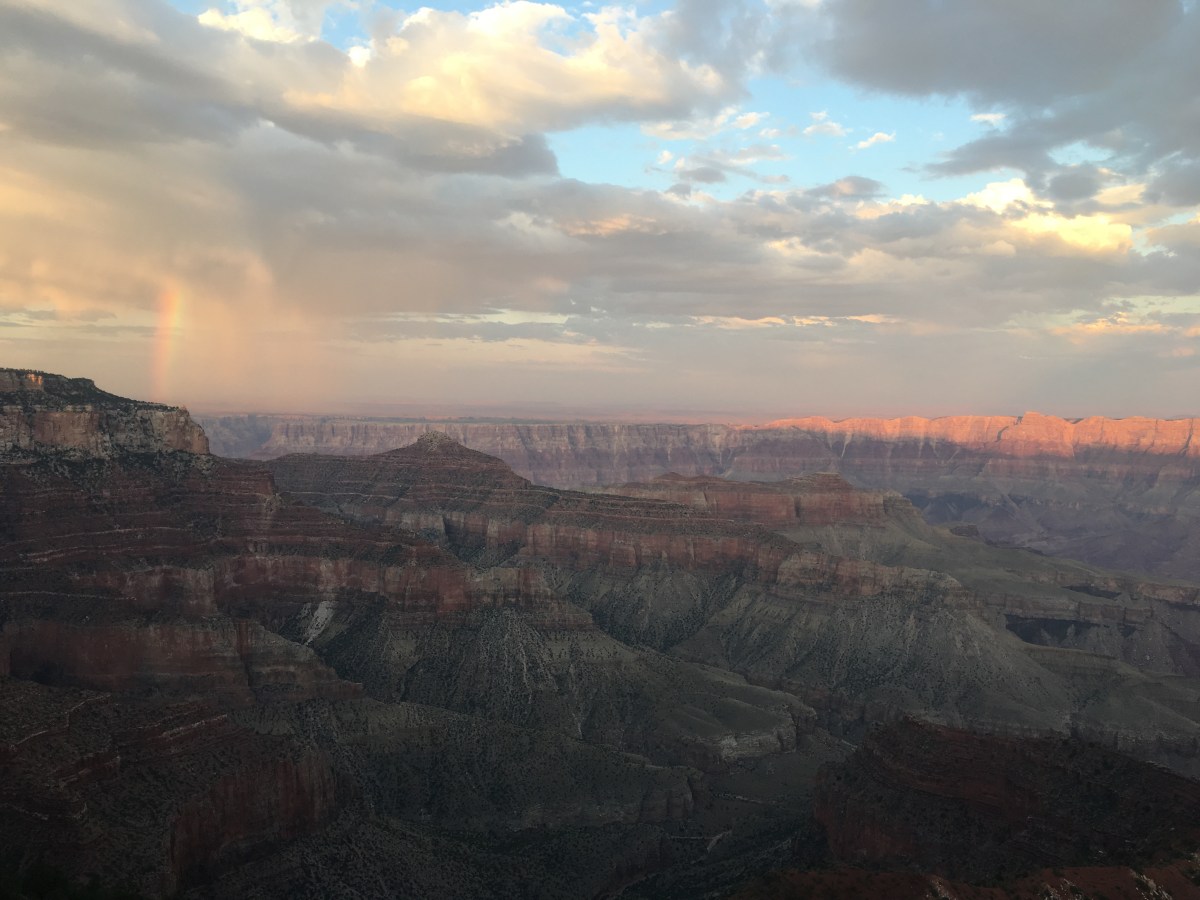
This was an absolute highlight of the trip, so be sure to enjoy Point Imperial! The only downside was driving back 22 miles on the road, in the dark, with deer and other animals lurking. It was shocking how fast some people wanted to drive the road.

Considering it was dark and there are deer that hang out on the sides of the road, we ended up sleeping in a turnout on the main road (67, Thompson Canyon) as if we were driving back to Kanab. Waking up in the middle of the night, pretty cold, I was rewarded by a completely clear sky and thousands of stars shining.

We had a long drive to Canyonlands, our sixth of seven national parks the next day. Catch up with us tomorrow to see how we did it!

Shuttle through Zion

Watchman Trail at Zion National Park | TeamTravelsBlog

Arrive early at Zion National Park for the best parking. There’s a hike for all skill levels here and a mandatory shuttle that takes you to all of the points of interest.

Zion National Park Highlights on Friday, September 1, 2017

  • Emerald Pools
  • Riverwalk Trail
  • Watchman Trail
  • Weeping Rock
  • Court of the Patriarch

Zion National Park is an easy two hour drive from Bryce National Park. We arrived before the 7 am sunrise and as we drove the windy road came across two big horned sheep crossing the road before the tunnel. I was lucky enough to whip out my iPhone fast enough to catch a video! Similar to Bryce Canyon, Zion costs $30 per car and is tied for the most expensive Utah national park (buy the Annual National Park Pass). Unlike the other parks, Zion has a mandatory shuttle that takes approximately 80 minutes to complete a full loop. If you’re like us and arrive super early, you’ll be able to find a parking spot in the park. We parked on the main path by the Canyon Junction shuttle stop (#3). If you want to see the shuttle route, check out this site: https://www.nps.gov/zion/planyourvisit/upload/MG-Spring-2017-ZION-WEB.pdf

After parking, we walked along the Virgin River for a little bit. There’s a wide paved path along the river where you can take beautiful pictures, see unique bugs and catch the morning bikers go by. Zion 1From here we took the shuttle from Canyon Junction (#3) to Zion Lodge (#5). We went to the road and followed the signs to the Emerald Pools. The walk is quite steep and the lower and upper falls were our favorite. When you leave the middle level emerald pool, take the Kayenta Trail. This will take you to the Grotto (#6) and gives you fabulous views of the Virgin River. Zion 2Keep your eyes peeled – we looked down at the river and spotted a deer standing in the water taking a drink. We saw tons of wild turkey at the Grotto. There’s also a place to fill up your water bottles and use the facilities here. If you’re up for the challenge, you can complete the strenuous hike up Angel’s Landing.

As it neared lunchtime, we took the shuttle to the last stop, the Temple of Sinawava (#9). There are lots of places to sit here and eat lunch, just be weary of the squirrels trying to steal your food. The Riverside Walk is a paved and easy two mile round-trip walk that starts here. The walk ends at the Narrows, which looks beyond incredible if the weather is right. If you’re considering this as part of your adventure, I would recommend this site which offers the appropriate rental gear.

Zion 3

It seemed like everyone we saw was wearing the Adidas hydro lace canyoneering boots and had hiking poles* to keep steady while wading through the water.


We needed a break to catch our breath so we took the shuttle to the Visitor Center (#1). If you haven’t gotten a park map and newspaper yet, this is a chance to get them. It was nice to sit in the air conditioning, eat our snacks and re-hydrate. From the Visitor Center, we walked to the Watchman trailhead. This hike has many switchbacks and limited shade in the afternoon, but it quickly became our favorite hike of the day. We saw lots of birds, butterflies and the views from the top are unmatched. When you reach the top, there’s a sign that points to an extra loop – take it! You won’t regret it. Zion 4
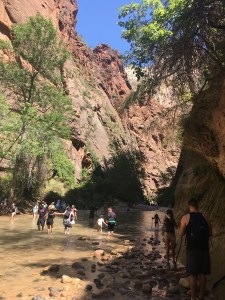
Considering it was the heat of the day when we hiked, we didn’t see many others on this trail, but we got lucky at the end and saw a grey fox!

Thankfully, the continuous shuttle gives you the opportunity to see almost everything along the main path. We took the shuttle to Weeping Rock (#7). It’s an extremely steep climb, but probably takes less than 45 minutes round-trip and is a cool point of interest. From here we took the shuttle to the Court of the Patriarchs (#4) and found another easy to see point of interest. The three sandstone peaks are named Abraham, Isaac and Jacob. You can read more about them at the viewpoint or hear about them on the narrated shuttle ride.

As the day neared sunset, we headed back to Canyon Junction (#3) to watch the sunset with others along the bridge over the Virgin River. Like the other national parks, watching the lighting change on the oversized sandstone rocks is a site worth photographing. We made the drive out of Zion National Park and were lucky to find a last minute deal through Booking.com for Sun-n-Sand Motel about 35 minutes away and in the direction of the Grand Canyon. I love Booking.com because you can make your reservation and pay once you arrive. If you use my link to make a booking, we’ll each get $20. We were lucky to book the motel for under $80. The motel was nice, clean and offered a free breakfast (think cereal, donuts, coffee, etc.). It’s also in a little town called Kanab that offers a grocery store called Glazier’s Market and gas stations.

Wake up with us tomorrow at the North Rim of the Grand Canyon, our fifth of seven national parks.

Sunset on the Hoodoos

Bryce Canyon National Park at Sunset | Teamtravelsblog

The famous hoodoos make Bryce Canyon National Park unique from the surrounding parks. Walk the rim of the canyon, see the sunset illuminate the rocks and try to photograph the pretty blue birds.

Bryce Canyon National Park Highlights on Thursday, August 31, 2017

  • Natural Bridge
  • Rainbow Point
  • Bryce’s Point – Bryce’s Amphitheatre and the hoodoos
  • Inspiration Point
  • Rim Trail between Sunrise and Sunset Points (1 mile roundtrip), see Thor’s Hammer

Bryce Canyon is the most expensive national park in Utah at $30 per car. Again, another reason to make sure you purchase the Annual National Park Pass for $80. When you go through the toll booth, the park ranger will give you a map and a newspaper. The newspaper is super helpful because it gives you advice for easy, moderate and difficult hikes toward the back of the paper which is consistent across parks. Different from the last two parks we visited, Bryce Canyon offers an optional shuttle service to see the different points of interest. We opted to drive from point to point instead and fortunately, never had an issue with finding parking. If you’re looking to follow along, check out this park map: https://www.nps.gov/brca/planyourvisit/upload/BRCAmap.pdf

We started down the main road (make sure to watch your speed as there are a number of park rangers monitoring this) and stopped at Farview Point followed by the Natural Bridge. Bryce Canyon 1Before making a stop, the park doesn’t appear to be that impressive. It’s probably because you don’t realize you’re driving along a canyon until you actually pull into a parking lot and look over the edge. As we continued toward the end of the road to see Rainbow Point, we pulled into the lots at Aqua Point and Ponderosa Point to take in these views. If you have the better part of a day and don’t plan on doing extensive hiking, you’ll have time to stop at each point of interest.

When we arrived at the Rainbow Point parking lot, we took the first spot we found. While it’s a relatively large parking lot, it fills up quickly close to lunch time since many people picnic here. There are a few good viewing points overlooking the canyon. Bryce Canyon 2Make sure to take some time to hike here. An easy, short trail is the Bristlecone Loop which is about 1 mile. If you’re lucky, you’ll see a Peregrine Falcon diving into the canyon (we were not). We did, however, see some of the largest ravens we’ve ever seen searching the picnic grounds for scraps.

On our way toward Bryce Point near the front of the park, we popped out of the car for pictures at the other pull offs along the scenic drive. Black Birch and Swamp Canyons were the other parts of the scenic drive worth stopping to see.

Bryce Point and this particular view of the Bryce Amphitheatre is incomparable to anything else. There are so many hoodoos!! Hoodoos instantly became our favorite “national park” related word. Bryce Canyon 9Hoodoos are the skinny and tall rock formations that you see everywhere at this park. The walk along the rim in the direction of Inspiration Point is definitely worth it. There is so much to take in at this particular stop. If you’re short on time, drive to Inspiration Point (or take the shuttle). We arrived to two deer grazing here and then headed to the rim to see the sun hitting the red rocks. If you’re up for the challenge, climb the steep hill to get the best vantage point from the top. While we did not use hiking poles*, we saw lots of people who were using these collapsible ones* on our trip. If you’re interested in having a pair for yourself, check these out on Amazon*.Bryce Canyon 4To end our time at Bryce Canyon National Park, we parked at Sunset Point. The walk between Sunset Point and Sunrise Point is incredible. If you have the right shoes and are up for the challenge, take a hike into the canyon. We enjoyed walking the rim of the canyon, spotting the pretty blue birds and watching the sun start to set and illuminate the rocks. We also spotted Thor’s Hammer, which is one of the better known and photographed hoodoos. As we awaited the sunset, fancy photographers gathered to find the best spots to capture the lighting change as the sun went down.

We found a decent place to carsleep outside of the park. My limit is three days in a row, so I was looking forward to a hot shower and bed for the next evening! Follow me to the next article to read about our incredible journey at Zion National Park – the fourth of seven national parks.

Petro-fied by Capitol Reef

Capitol Reef National Park | Teamtravelsblog

We visited 7 National Parks in 7 Days! Capitol Reef National Park in Utah was our second park of the trip after Arches and before Bryce Canyon. Be sure to check out all 7 parks!

Capitol Reef National Park Highlights on Wednesday, August 30 and Thursday, August 31, 2017

  • Panorama Point
  • Goosenecks Overlook
  • Sunset Point
  • Scenic Drive and the Capitol Gorge
  • Hickman Bridge
  • The Petroglyphs

Arriving at Capitol Reef National Park in the afternoon was perfect because we made it to the Visitor Center before it closed. This allowed us to grab a map and use their facilities. If you need a map, here is a good one: https://www.lib.utexas.edu/maps/national_parks/capitol_reef_park97.pdf The road beyond the Visitor Center, the Scenic Drive, is the only part of the park that you have to pay for and it’s the least expensive National Park in Utah at $10. We drove to Panorama Point and were impressed by the views. Capitol Reef 1The way the light hits the colorful rocks is incredible. A bit farther up the road, which is windy, rocky and narrow, we made it to a small parking lot by Goosenecks Overlook and Sunset Point. The Goosenecks Overlook was our first time looking into a canyon and it is breathtaking.

Capitol Reef 9

It’s hard to fathom that this is a natural creation versus a man-made one. We timed it right and walked along Sunset Point as it drew nearer to sunset. I’m not sure how we got so lucky, but we had the views to ourselves. There are a few benches along the path to sit and enjoy the view.

Almost across the street is another point of interest called Chimney Rock. We saw lots of kids enjoying the huge mounds of dirt – running up and down – burning energy. We enjoyed a short walk here before we headed to the scenic drive still shortly ahead of sunset. Capitol Reef 3
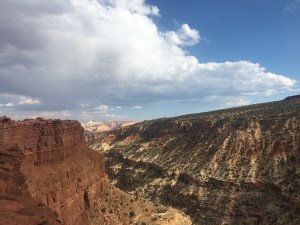
We had to drive very carefully as we saw many deer along the road near the campsites. It is cool to reflect that we ended up seeing deer at six out of the seven national parks that we visited during our vacation. We drove along the Scenic Drive until we made it to the signs that read Capitol Gorge. We didn’t exactly know what we were in for either. This is an extremely narrow and scary drive.

Capitol Gorge

It is closed it if rains and it is terrifying when another car approaches you on the path. Fortunately, we made it to the small parking lot at the end and it really was an experience that shouldn’t be missed. If you’re looking for a self-guided tour, the national park service offers this guide with recommended stops. By this point it was dark on our drive back along the Scenic Drive.

Torrey, Utah is the closest small city to Capitol Reef National Park where we found a good place to carsleep for the night. It’s located on the west side of the park beyond Panoramic and Twin Rocks. While it’s not far mileage-wise, it’s important to drive carefully as it’s windy and there are deer to be cognizant of.

In the morning, we drove to the Hickman Bridge parking lot. We actually passed this on our way in from Arches National Park. It’s a small parking lot with two restrooms in the parking lot that remain unlocked. You will definitely want to have a flashlight* if you arrive early as well as hand sanitizer* for afterwards. The bathrooms are dark, there are flies and no running water. Luckily, you can do all of your shopping on Amazon before your trip. Capitol ReefThe beginning of the hike is very easy and relatively flat along the river. Then there is quite a steep climb before reaching a point before you then start walking down again. We saw lots of playful chipmunks and a few amphibians, but no snakes thankfully! The arch is awesome once you arrive. Enjoy calling out so you can hear your voice echo back. Once you go under the arch, we found it challenging to find and stay on the path, but fortunately made it around the loop as the sign recommended (counterclockwise direction).Capitol Reef 10

From here, we headed to see the Petroglyphs. Seeing a piece of history etched onto the rock is incredible. The first wooden dock explains the petroglyphs and points them out. If you continue along the longer wooden bridge, keep your eyes peeled and see if you can spot some of the unsigned petroglyphs. When you continue on your journey, you’ll pass through the Fruita Historic District where I read you can pick and eat fruit. Before completely leaving the park, we stopped for a shot of the Twin Rocks and the Capitol Reef National Park sign.

We left the park before mid-day and drove about 2.5 hours to Bryce Canyon National Park. There is more than one way to get to this park. We did not follow the sign that pointed toward Bryce Canyon, but rather took the GPS directed way. It took us through a lot of farmlands and we did not see any gas stations, so make sure you fill up in Torrey before making this leg of the trip. Follow me to the next article to read about our adventure through Bryce Canyon, the third of seven national parks.

Arch You Red?

Arches National Park | Teamtravelsblog

We visited 7 National Parks in 7 Days! Arches National Park in Utah was our first park of the trip after leaving Denver. Be sure to check out all 7 parks!

Arches National Park Highlights on Wednesday, August 30, 2017

  • Balanced Rock
  • Sand Dune Arch
  • View from La Sal Mountain
  • Landscape Arch in Garden of the Gods
  • Note: The Windows Section of the park was closed during our trip and the park was only open from 7 am – 7 pm.

We arrived to the Denver, Colorado airport on Tuesday evening, picked up our full sized rental car and drove to the Wal-mart in Avon, Colorado. Do your due diligence and read the tiny print when booking a Denver rental car. Not all car companies offer out of state driving or unlimited miles. We came across a few companies (the ones with the cheapest rental prices) that had these limitations. We picked this particular Wal-mart as our driving destination for the evening because it’s a 24-hour store, which was perfect for picking up snacks, using the bathroom and finding a quiet corner of the parking lot to sleep.

We woke up super early to drive the remaining 3.5 hours to Arches National Park. There is an Exxon station before you get to the park when approaching from the highway, that’s a bit pricey, but worth it for the peace of mind of having a full tank of gas. Alternatively, you can drive past Arches and into Moab to fill up with gas. Immediately after making the turn into Arches National Park, there’s a place to pull off and pose with the Arches National Park sign. Arches 1If you arrive before the park opens, there’s no one at the gate, however, if you plan on seeing multiple National Parks, it’s worth spending the $80 to get the Annual National Park Pass as most of the parks average $25 for admittance.

It’s worth printing the map (https://www.nps.gov/arch/planyourvisit/upload/archmap.pdf) from the National Park Services (NPS) site before you start your trip and then getting a fancy one at the Visitor Center later in the day. We stopped at the Courthouse Towers Viewpoint first to take in the beautiful red rocks. From here we continued north on the main path to Balanced Rock. Arches 2One benefit of starting early is you’re likely to beat the tour busses that are bound to come and stop at these points of interest. Balanced Rock is perfect for taking a short stroll and stretching your legs from the car ride.

As I mentioned at the top, the famous Windows Section of the park was closed. We headed east when the road split to see the Delicate Arch. Unfortunately, since Mike was still healing from a broken foot, we didn’t have the opportunity to take the walk up to the arch, where I believe it would have appeared to be much larger than it did from the viewpoint. Everything I read said this is a really nice hike that we will definitely plan to do the next time. From here, we headed back to the fork in the road along the other path to the Sand Dune Arch. This was a highlight for us. It was a fun walk through the sand to see the arch.Arches 5

There are other places between Sand Dune Arch and the Devils Garden to stop and take pictures.

Arches 3

We stopped a few times before parking by the Devils Garden. It was a decent walk to the Landscape Arch. Make sure to bring tons of water as it can get very hot and there is limited shade for a reprieve. Many people start or end their day at the Devils Garden as the heat can be treacherous. If you plan on doing lots of hiking, I highly recommend my Columbia hiking boots* which aren’t too heavy and are waterproof. We drove back along the main drag and made our last major stop at the La Sal Mountain viewpoint. This is an incredible view with lots of points of interest to take in such as the Three Gossips, the Tower of Babel and the Organ.

We wrapped up our Arches National Park visit at the Visitor Center where we were able to get a map and newspaper, use the facilities and fill up our water bottles. From here we drove about 5 miles to Moab and made it to Wicked Brew Espresso Drive Thru before it closed. Arches 4
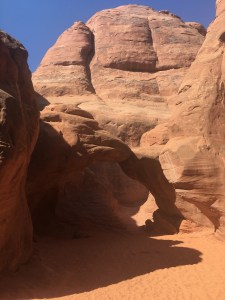
This little trailer coffee shop offered delicious iced lattes with unique flavor combinations.

The two and a half hour drive to Capitol Reef National Park had a variety of terrains and seemed as though we were driving through national parks the entire time. It’s essentially a one lane road in each direction the whole way. Check out my next article to learn more about our adventures here and the subsequent ones to read all about our 7 parks in 7 days trip!

“Choc” it up for a sweet day!

View of the Harrisburg, Pennsylvania State Capitol Building | TeamTravelsBlog

Living on the East Coast makes places like Harrisburg and Hershey. Pennsylvania and easy day trip from Maryland. The sweet smell of chocolate can be smelled through Hershey!

Saturday, July 29, 2017 – Harrisburg & Hershey, Pennsylvania

Harrisburg, Pennsylvania Highlights (9:15 am to 11:30 am approx.):

  • Broad Street Market (Evanilla donuts)
  • Midtown Scholars
  • Capitol Building
  • Cathedral Parish of St. Patrick
  • Little Amps Coffee Roasters
  • View Susequehanna River and bronze statue at Kunkel Plaza

Harrisburg is a great day trip from the DMV (DC-Maryland-Virginia) area. From Silver Spring, Maryland it was about 2 hours and 10 minutes of stress free driving on a Saturday morning in July. Once you hit I-83, this road pretty much takes you all the way to the city center. We knew we wanted to get a taste of this city before checking out Hershey (Yep! This is the chocolate mecca of the Hershey Company.). We started our morning around 9:15 a.m. at the Broad Street Market. This market is in two buildings, with one having the fun treats like coffee, donuts, breads and other delectables, while the other looked to have a lot of seating and more lunch style offerings. I have a sweet tooth, so I had to try the donuts – that’s right not one, but two. I had the yummy coconut and the coffee toffee upon recommendation from Evanilla. [Side note: As a bonus, there is a restroom here if you need one after your ride.]  On Saturdays, the parking is free all around the market too. We found a great spot with a 2 hour time limit.

In planning our trip, I came across a highly recommended bookstore called Midtown Scholars. I know, I know, a bookstore on your day trip?! The layout of this store is so cool and they even sell books by the “foot”. It’s like a bookstore labyrinth with tons of nooks and cranies with places to sit and take in the atmosphere (and for charging your phone if needed).

Broad Street Market in Harrisburg | teamtravelsblogOn the top level, you can also peer out the window and get a good look at the “Broad Street Market” sign or do like us and stand in the middle of the street for a good selfie.

We took a walk over to the Capitol building. The Capitol had lots of flowers blooming and a really different looking dome that appeared to be green and gold. We were interested in possibly taking a tour, so we walked until we found the only entrance open on a Saturday by N. 3rd and State Street. There was a tour at 11 am that would have been great, but we opted to go through security and check out the rotunda and keep it moving. The rotunda is definitely worth a look, even if you only have a few minutes to spare. There’s also a bronze plaque on the ground marking where Teddy Roosevelt stood to dedicate it.

When we left, we walked along State Street, where you can get great shots of the Capitol from the median in the road and also spend a few minutes taking in the beauty of the Cathedral Parish of St. Patrick. The church is reminiscent of many of the beautiful churches we saw on our trip to Munich and other European cities this past March. One of my favorite things to do on any trip is to find a well-known, local coffee place to try. There were a few in Harrisburg that had good reviews, but I decided to try Little Amps Coffee Roasters diagonally located from the Cathedral. It has a cool, somewhat hipster vibe and I was recommended to try the iced nitro coffee, which was so good! I only had to add a few kernels of raw sugar and I was amped! Little Amps Coffee Roasters | teamtravelsblogWe continued along State Street to the Susquehanna River. This part of the Capital Area Greenbelt is gorgeous and I definitely want to return to bike the full 20 miles! Make sure not to miss the bronze statue of a man sitting on a bench reading his newspaper. It’s a perfect photo op! Put your arms around him, give him a peck, go crazy! Given the two hour parking limit, we arrived back to our car, set the GPS and were on our way to Chocolate Town USA!

Hershey, Pennsylvania Highlights (12 pm – 11:45 pm approx.):

  • Hersheypark
  • ZooAmerica
  • Chocolate World

Within about 25 minutes we were in Hershey, PA! I read online that there’s a free shuttle that picks up on Chocolate Avenue outside the Hershey Story to Chocolate World. We parked in the lot next to the Hershey Museum and left our car for the day without issue (I would recommend doing your own research before doing it yourself to make sure you feel comfortable.). We missed the shuttle, and while it comes every 15 minutes, we went ahead and walked to Hersheypark which was about a mile and saved us $15+ bucks on parking.

Thank goodness for smart phones, because I was able to book our park tickets on the phone while walking and found a buy one get one day free pass for each of us (alternatively, spend time before going to find out which retailers have coupons; I found a $12 off in July coupon per ticket at my local CVS). I was also able to download the Hersheypark app onto my phone which gives you wait times per ride (super helpful!) and will help you get from point to point using the phone’s GPS if you want this. Of course, there’s always a good old fashioned paper map you can find in the park (I picked up one for my scrapbook.). Since we didn’t arrive as soon as the park opened, we didn’t know quite where to start so we headed to the ZooAmerica entrance from within Hersheypark which is included in the admission price. It’s an easy, 1 hour loop that highlights North American animals. We particularly like the brown bears, bald eagles and the bobcat.

We were ready to find a good roller coaster (they have 13 to pick from)! Our favorites were Fahrenheit, Storm Runner and Laff Trakk. Laff Trakk also had super goofy mirrors that were great for selfies before boarding the ride.  View of a roller coaster inside Hersheypark | TeamTravelsBlogWe also really enjoyed the Reese’s Cup Xtreme Challenge and the new Hershey’s Drop Tower. One thing that was amazing is that after certain rides, they give you almost 2 ounces of free Hershey candy like Reese’s Crunchers! I tried some delicious treats this way. We stayed at the park until about 10 pm on a night where they closed at 11 pm.

Since we hadn’t stopped on the way in, we popped into Chocolate World to check out the great display of candy characters in the middle and catch the free ride that takes you through the making of Hershey chocolate. Hershey's Chocolate World | teamtravelsblogThe line took about 30 or so minutes, so be prepared to wait. We jogged back to the car using our phone flashlights as our guide given there are no street lights. Luckily, the area felt safe and we didn’t have any issues getting our car back at the Hershey Story. A touch before midnight we were back on the road and into our beds by 2 a.m. Can’t wait to spending another day this summer at Hersheypark to finish riding the rest of the roller coasters and further exploring the waterpark!

Did I miss anything? I would love to hear about your favorite spots in Harrisburg and about your favorite rides at Hersheypark!

Ponies by the Seashore

Assateague, MD to see the ponies | TeamTravelsBlog

The Eastern Shore of Maryland includes a beautiful national seashore called Assateague, the popular beach at Ocean City and quaint little towns like Berlin and Salisbury. Check out our weekend getaway to these places.

Saturday, July 1 – Sunday, July 2, 2017

Eastern Shore, Maryland Highlights:

  • Assateague National Seashore – ponies, trails and the beach
  • Ocean City, Maryland
  • Berlin, Maryland
  • Salisbury, Maryland

It’s hard to believe that we have lived in the DMV (DC-Maryland-Virginia) area for well over 5 years and had never visited the Assateague National Seashore. It’s about a 3 hour drive east of Silver Spring, Maryland, assuming you don’t blindly follow the iPhone GPS and end up heading north to Baltimore first (yep, we really did that) making the trip closer to 4.5 hours. Make sure to pack bug spray and sunscreen! The horseflies are no joke here!

There is a beautiful new visitor’s center, called Barrier Island Visitor Center (with good bathrooms) and a huge parking lot on the right hand side of the road before you cross the Verrazano Bridge. Some people choose to rent or bring bikes to get onto Assateague Island for free. We chose to buy the Annual National Park Pass for $80 since the admission to Assateague is $25 alone and we anticipate going to many more parks this year. One benefit I learned is that by purchasing the pass on July 1, we actually get 13 months (through July 2018) to use the pass.

We were very lucky to cross the bridge and instantly see two ponies grazing before even passing the booth where you show your park pass! Best advice is to have your eyes open and your camera ready! There are three short trails (approximately ½ mile each) called: Life of the Forest, Life of the Dunes and Life of the Marsh. Life of the Marsh was by far our Life of the Marsh trail | teamtravelsblogfavorite. While driving around, we were fortunate to see a few horses at two different camp sites as well as a deer (one of the campsites is the one across from the Life of the Marsh parking lot).

Walking along the beach is a must! We found really beautiful stones and shells that washed up with the tide. Plus when the sun is shining, why not take advantage and get an even tan by walking the shoreline. After you’ve gotten your fix of Assateague, I recommend getting in the car to drive about 20 minutes north to Ocean City, Maryland.Ocean City Boardwalk in Maryland | teamtravelsblog We found parking to be quite a challenge, so make sure to pack your patience. Ocean City has a Boardwalk that is 2.45 miles long and has signs at either end to tap and/or take your picture with.

Assateague 14

The Boardwalk is a bit different from the one in Ocean City, New Jersey. The one in Maryland felt busier to us, but had similar type shops, restaurants, sweet treats and games. While strolling along the Boardwalk, keep an eye out for art displays in the sand and cool kites.

Before calling it a night, we drove about 20 minutes to Berlin, Maryland. This is dubbed America’s Coolest Small Town (they even have a huge sign to prove it)! Assateague 10While almost everything was closed, the “Island Creamery” ice cream shop had a huge line! It was fun to window shop the antique stores, look at the home sale flyers and notice the cute coffee shops like “On What Grounds?” on the main street. After we got our steps in (yep, we counted them on the Garmin and got over 36,000; Mike got 40,214 with his run) we were ready to call it a night.

Now, if you’re like us and really want to save money and don’t have any kids, we recommend carsleeping at the Wal-Mart in Berlin, Maryland. If it’s a nice night, find a good parking spot, crack your windows, turn off and lock the car. One huge benefit (besides the monetary one) is you will be woken up by the rising sun if you don’t set an alarm. We felt safe and this location was only a 15 minute drive back to Assateague to see the sunrise on the Atlantic Ocean. We arrived on Assateague Island, parked in the main beach parking lot (it’s on the left after you pass the toll booths, which aren’t checked at this time) and walked to the water to see the sunrise. You’ll likely find a small group gathered with the same idea, but luckily there’s plenty of room on the beach for everyone to enjoy.
Sunrise at Assateague | teamtravelsblogAfter taking in the sunrise, make sure to jump back in your car and continue along the main street. We got to the roundabout and saw four ponies and then on our way out saw at least 10 more. Again, have your camera ready! Assateague, MD to see the ponies at sunrise | TeamTravelsBlogHaving taken it all in, we decided to drive to Salisbury, Maryland to check out this small town. If you decide to roll through this small town, I highly recommend a stop in (or drive thru) to Rise Up Coffee. Their seasonal lavender latte was delicious! We drove by and saw the beautiful campus of Salisbury University while we waited for the free Salisbury Zoo to open. The zoo is very small, but if you’re zoo people like us, that won’t deter you from at least checking it out. The macaws were funny to watch flip around on their rope. Hopefully if you go, more of the cool animals like the sloth and jaguar will be out and about.

That’s it for our weekend trip! Perhaps next time we will check out Easton, Cambridge or St. Michael’s. Have you visited any of these? We would love to get ideas for what other great stops are in our backyard.

On a Mission to La Jolla

Sea Lion in La Jolla | Teamtravelsblog

If you have time to drive to the outskirts of San Diego, make the trip to La Jolla! It became a highlight of our 4-day trip seeing sea lions and seals up close and in their natural habitat.

San Diego Highlights for Sunday, June 4 (Day 2):

  • Mission Beach
  • Bird Rock Coffee Roasters
  • La Jolla – sea lions, seals and an outdoor market
  • Torrey Pines State Park and Beach

There’s nothing quite like waking up and realizing, you’re in California! We’ve found that carsleeping is surprisingly comfortable when the seats go back and the temperature is just right. We woke up pretty early again (before sunrise at 5:41 am) and drove to Mission Beach. The parking lot was desolate with the exception of trash and the world’s largest seagulls! These seagulls were the size of large cats! Strolling along the boardwalk as the sun went up was a perfect way to start our day.

It was a direct shot north from Mission Beach to Bird Rock and the Bird Rock Coffee Roasters. I enjoyed their regular coffee and the coffee house had a nice ambience. I was thrilled to have a bathroom to freshen up in too! Unfortunately, when I returned to the car I was convinced I had locked the keys in the car. I didn’t know how I did it, but I was in straight panic mode! Fortunately, for both of us, I ended up having the keys and there wasn’t a need to call AAA on our vacation! We then continued through Bird Rock until we made it to La Jolla (pronounced like “hoya”).

La Jolla should not be missed! Within a second of overlooking the ocean, we could hear and see sea lions! There were tons of sea lions relaxing, jumping in and out of the water, and cuddled up together. We enjoyed roaming onto the rocks (the ones that warn you not to get too close to the sea lions) so we could get some great pictures of the sea lions. We also saw lots of people swimming in the water. We walked down some stairs to get up close to the beach area where the swimmers were entering and exiting the ocean. As we went to go back up the stairs, a huge wave started coming and I literally jumped up to grab the rail and try to avoid getting my shoes wet! I was lucky I didn’t get slammed into a rock and made it out unscathed.

We continued south along the water until we made it to the Children’s Beach (or Seal Beach). I couldn’t believe it – there were so many seals! There’s a staircase to walk onto the beach and stand behind a rope to enjoy a view of the seals. There’s also a walk way to view the seals from above.

They are funny to watch as they shimmy their way into the water. They look like they’d be fun to play with! Our good friends from LA drove down to meet us here and it was great to watch their 2-year old take in the animals.

Our sweet LA friends | Teamtravelsblog

Funny enough, she seemed most amused by the seagulls. We got great refreshing drinks at the Living Room Coffeehouse. This place had cool artwork displayed. We then walked up to La Jolla Elementary School to the Open Aire Market. The market had lots of clothes, crafts and food. Plus, with a 2-year old, it also had a nice sized jungle gym for her to play on. Our friends told us we couldn’t come to California for our first time ever without trying Mexican food.

The Living Room | Teamtravelsblog

We found a great hole in the wall (it literally had 4 tables) called Don Carlos Taco Shop that was delicious!

Shortly after lunch, we parted ways and drove north to Torrey Pines State Park. It was quite confusing at first to find parking, since some of the parking includes parking spots on the main thoroughfare. Luckily, we improvised, turned the corner at the intersection following the Torrey Pines State Beach and found a neighborhood with free parking for the day (instead of paying for access) with a minimal walk to the entrance.

The beach part of Torrey Pines is pretty. It’s a narrow beach. After passing the toll booth (which is free if you walk on), we continued up a steep road with switchbacks where you can see the actual torrey pine trees the park is named for.

Torrey pine at Torrey Pine State Beach | Teamtravelsblog

There’s also a wonderful visitor center to get suggestions on where to hike. We found this to be extremely valuable, because there are some paths that aren’t accessible along the beach during high tide. I’d recommend wearing pants so you don’t brush up on anything when you’re on the trails.

From here it’s about a 2.5 hour drive to Joshua Tree National Park (west entrance). We absolutely LOVE national parks and couldn’t miss the opportunity to take a detour here during our 4 day trip to San Diego. One big tip is to make sure you fill up on gas when you have the opportunity and definitely before entering the park. Since we drove in the evening, we parked at the Wal-Mart (58501 Twentynine Palms Highway) about 15 minutes from the entrance to carsleep and felt safe. Check back soon if you’d like to read about our 100+ degree day at JTNP!

View of the Pacific Ocean | Teamtravelsblog

Croon for June in San Diego

San Diego Skyline from Coronado Island | Teamtravelsblog

Forget June gloom – San Diego in June is the perfect time to visit, even if the weather is a bit overcast. There’s beautiful beaches, baseball and a boatload of other things to do!

San Diego, California Highlights for Saturday, June 3:

  • Beach and biking on Coronado Island
  • Gaslamp District
  • Petco Park – Padres home game
  • Seaport Village
  • Little Italy
  • Balboa Park
  • Old Town

We are deal travelers and when you see direct flights for $208 from DC to San Diego, you jump all over them! Every year for Mike’s birthday we go to a city with a baseball game in town. Last year we went to a Yankees game (New York City), two years ago we went to a Phillies game (Philadelphia), three years ago we went to a Orioles game (Baltimore) and this year we had the luxury of a Padres game in the beautiful city of San Diego.

In order to minimize the number of days off from work, we took an afternoon flight on Friday to San Diego. We picked up our rental car from Hertz that I found through Priceline, name your own price for under $100. It was very easy to take the courtesy from the airport. We drove around San Diego before finding a place south of downtown to carsleep. It didn’t feel like the best area, but we locked our cars, put back our seats and slept well. Our goal was to get our Saturday started early.

We succeeded! We were up before 5 am and made the short drive over the Coronado Bridge and onto Coronado Island which is nicknamed the “Emerald City”.

Coronado Inn | Teamtravelsblog
Coronado Inn in the morning | Teamtravelsblog

There are beach spots along Ocean Boulevard that are marked next to the Coronado Inn and the rest are parallel parking spots. Luckily, we didn’t have any issues since we arrived so early. We were so excited to walk along the beach on the Pacific Ocean and explore around the famous Coronado Inn.

While Mike went for his run, I checked out some of the neighborhoods and walked to Panera Bread to get a coffee and bagel. After Mike’s run, we got in the car and drove to the other side of the island, which is also closer to the ferry, to rent bikes from Bikes & Beyond. We rented bikes for about two hours and took in the island’s well thought out bike paths. Of course the bike shop also provides a free map and recommendations. The bike ride takes you by gorgeous homes and a golf course. If you have time and are interested, it may be worth checking Groupon* or Goldstar as there were also bike rental tours available for good prices.

Biking on Coronado Island | Teamtravelsblog

Lastly, don’t leave the “ferry-side” of the island until taking in the beautiful views of San Diego and the skyline along the water.

From Coronado, we drove to Balboa Park and left our car at Inspiration Point for free. We then walked a little over a mile to get our tickets for the Padres game at Petco Park. The baseball tickets were a little pricey, but the park is amazing!!

Petco Park | Teamtravelsblog

Since it was within a day of Mike’s birthday, he actually got free chocolate ice cream (which I ate of course)! Make sure to take in the park – see the dog park, the statues and the view of the Coronado Bridge. (If for any reason you come when there isn’t a game, I read you can see the Coronado Bridge from the Central Library up the street.)

Top notch baseball park | Teamtravelsblog

Petco Park in East Village is next to the Gaslamp District, which is the perfect area to walk around. There are tons of restaurants and it has a great atmosphere. Don’t miss the famous “Gaslamp Quarter” archway sign. From the Gaslamp District, we walked a short distance to Seaport Village. This area has lots of cute stores, it’s on the water and there are interesting people to watch.

Gaslamp Quarter
Gaslamp Quarter | Teamtravelsblog

We saw a street performer stick multiple swords down his throat (after building up the hype for a good 20 minutes)! It was insane! We also saw people dressed up like Star Wars characters. If you continue along the water, you’ll make it to the U.S.S. Constitution ship and “the Kiss” statue. The Kiss statue is really cool and the National Harbor in Maryland actually has a small version of this statue now too.

"The Kiss" | Teamtravelsblog
“The Kiss” | Teamtravelsblog

If your feet aren’t hurting too much, I would recommend a walk through Little Italy. It’s another quaint area with lots of restaurants. We walked from here back to our car in Balboa Park. This was quite a hike, but if you’re looking to take in more of the city, it’s a good way to do it. Once back in our car, we drove to Old Town. Thankfully, this area had a free parking lot. We wandered through the markets, listened to the music and I tried some inexpensive warm tortillas from a street vendor.

Old Town | Teamtravelsblog

Oh, and I should mention, we were exhausted by the end of this day and found a great place to park our car and sleep for the night where we could hear the trains go by.